I recently published and shared with the world my first real open-source project. It brought some traffic to its Github page and some people even starred it. This made me super happy, knowing that other people find my project useful or interesting enough to give it a star.
I appreciate every star and maybe it’s just me, but I can’t help but check the repo at least once a day to see how it’s doing 😅.
The other day, I had some free time in the afternoon and got an idea. I could leverage a Github webhook to trigger an event whenever someone stars my project and then use Telegram API to send me a notification message.
And on top of that, as always, there has to be something new that I could learn about.
I’m a big fan of
Deno, the promising successor to Node.js built by the same author. So this is a good chance to get a closer look at it. Also, I’ve wanted to try out Cloudflare workers for a long time, so the time has finally come.
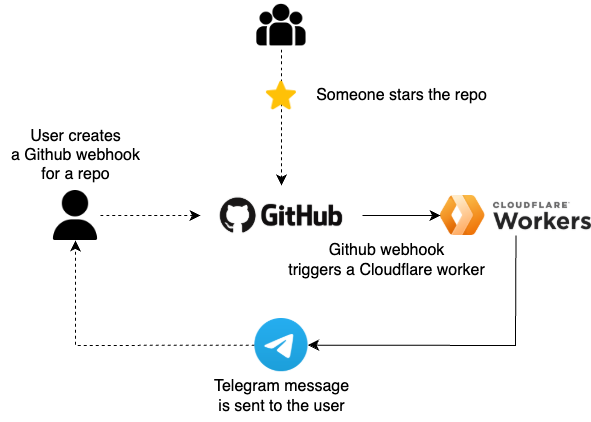
In the diagram below you can see the whole flow.
Handling a Github event
In its heart, the event handler is fairly straightforward. As you can see in the code snippet below, this is the special format used by Cloudflare workers to run our code when a request comes. You just need to export a fetch() function and implement your logic inside it.
In this example, we just get the request body, validate the request, and log a message based on the action type. Validating a request signature is very important as it works as an authentication to make sure only authorized clients (Github) can call your endpoint. Otherwise, anyone who knows the URL could send malicious data to it.
The way this works is that you define a secret value and register it in Github when creating a webhook. Then, when the webhook is triggered, Github uses the provided secret to calculate a signature for the payload that it sends to your URL.
You should then verify the signature using HMAC first, and only handle the request if the verification passes.
import { verifySignature } from './github/signature.ts'
import { GithubStarEvent } from './github/types.ts'

interface Env {
  GH_WEBHOOK_SECRET: string
}

export default {
  async fetch(request: Request, env: Env): Promise<Response> {
    // get data from the request
    const githubData = await request.json() as GithubStarEvent
    const signature = request.headers.get('x-hub-signature-256')

    // validate Github request signature
    if (!await verifySignature(env.GH_WEBHOOK_SECRET, signature, githubData)) {
      console.error('Github signature mismatch', request.headers)
      return new Response(
        JSON.stringify({ error: 'Unauthorized request.' }),
        { status: 403 },
      )
    }

    if (githubData.action === 'created') {
      console.log(`Yay, a new star added to ${githubData.repository.full_name}`)
    } else if (githubData.action === 'deleted') {
      // Sad ... 😢
      console.log(
        `Oh no, @${githubData.sender.login} removed their star from ${githubData.repository.full_name}`,
      )
    }

    return new Response(null, { status: 204 })
  },
}
The complete code can be found on Github.
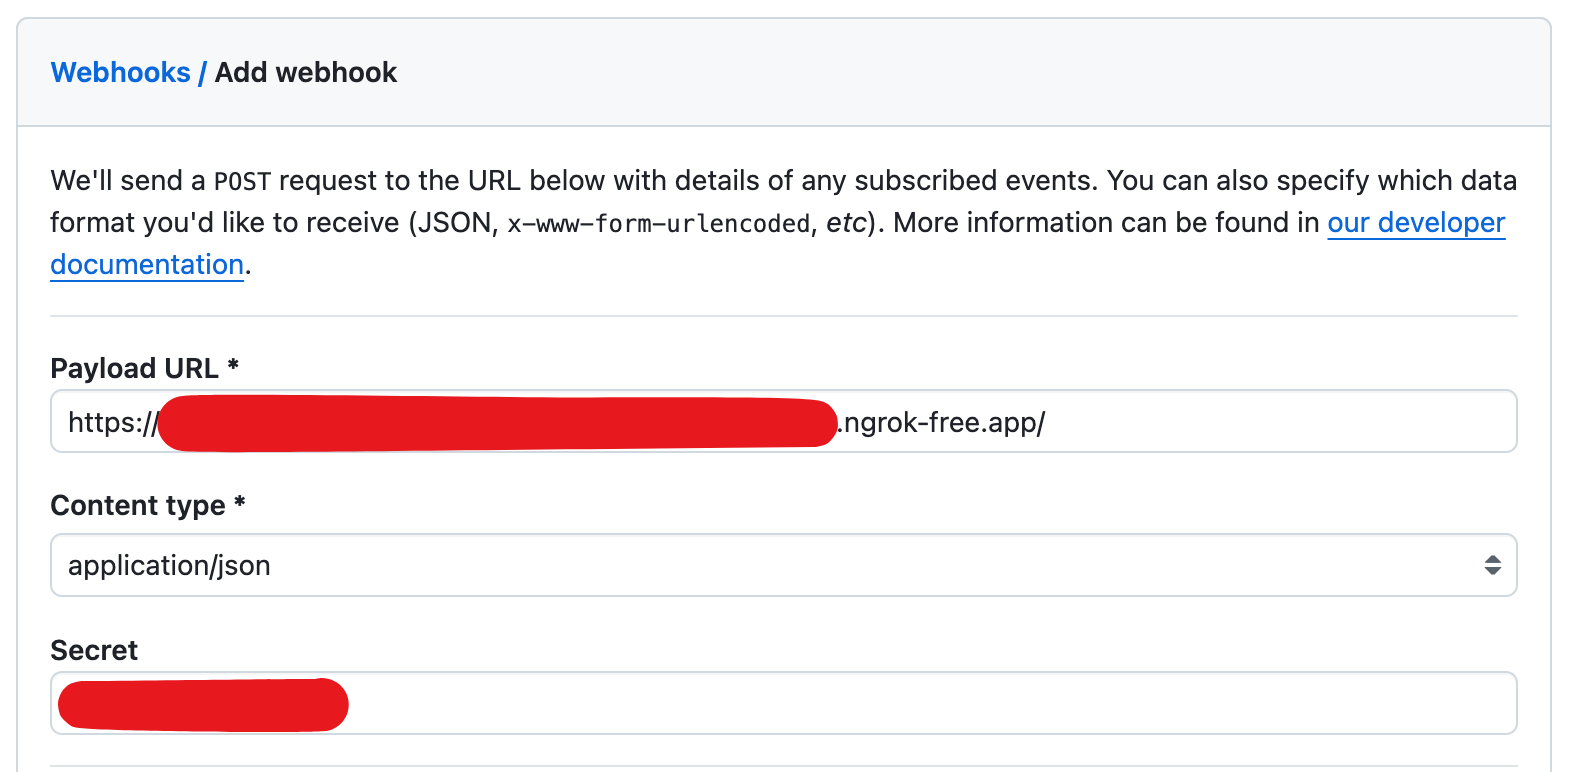
Register a Github webhook
Open your Github repository page, click on the Settings tab → Webhooks → Add Webhook.
There you can provide a URL that should be called when an event happens. In this case, we do not have the code deployed yet, and also for development purposes, it’s best to temporarily use a locally running web server, that is exposed to the internet, e.g. by using
ngrok.
Next, set
Content-Type to application/json and choose a value for the Secret field that we described above.
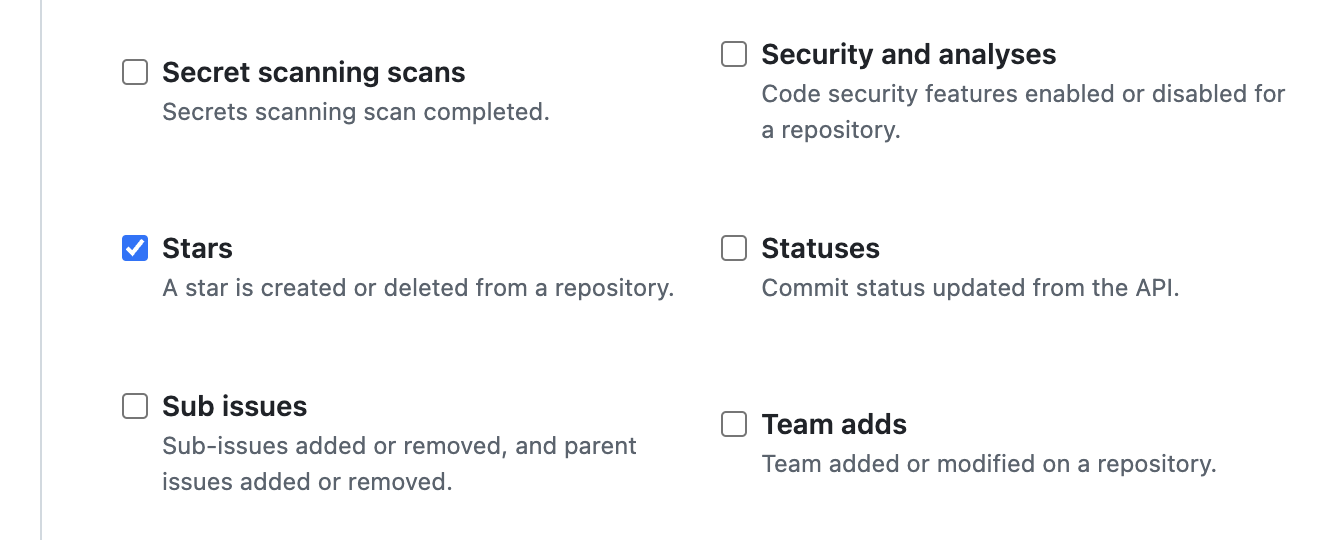
In the “Which events would you like to trigger…” section, choose only Stars and uncheck Pushes that is enabled by default.
Create a Cloudflare worker
Cloudflare Workers is a serverless platform that allows you to run your code without needing to care about the infrastructure or scaling. It is similar to AWS Lambda or other function-as-a-service (FaaS) solutions. Once deployed it provides a URL address that you can use to trigger your function. Alternatively, you can also set up a scheduled run by defining a CRON job.
To deploy a code to the worker we would typically use Wrangler - an official CLI tool for interacting with Cloudflare, but since we’re using Deno, which is not officially supported yet, we will instead go with Denoflare, a community-driven alternative for deploying Deno-based services to Workers.
In order to configure it, create a .denoflare file where you define your function main file.
{
    "$schema": "https://raw.githubusercontent.com/skymethod/denoflare/v0.6.0/common/config.schema.json",
    "scripts": {
        "gh-starboy": {
            "path": "src/main.ts",
            "localPort": 8000
        }
    }
}
Ensure you have your Cloudflare credentials configured (env variables CF_ACCOUNT_ID and CF_API_TOKEN). Once you do this, run this command to start the local server.
$ denoflare push gh-starboy --secret-binding GH_WEBHOOK_SECRET:"your-secret-value" --bundle 'backend=esbuild’This will bundle the code and deploy it to Cloudflare.
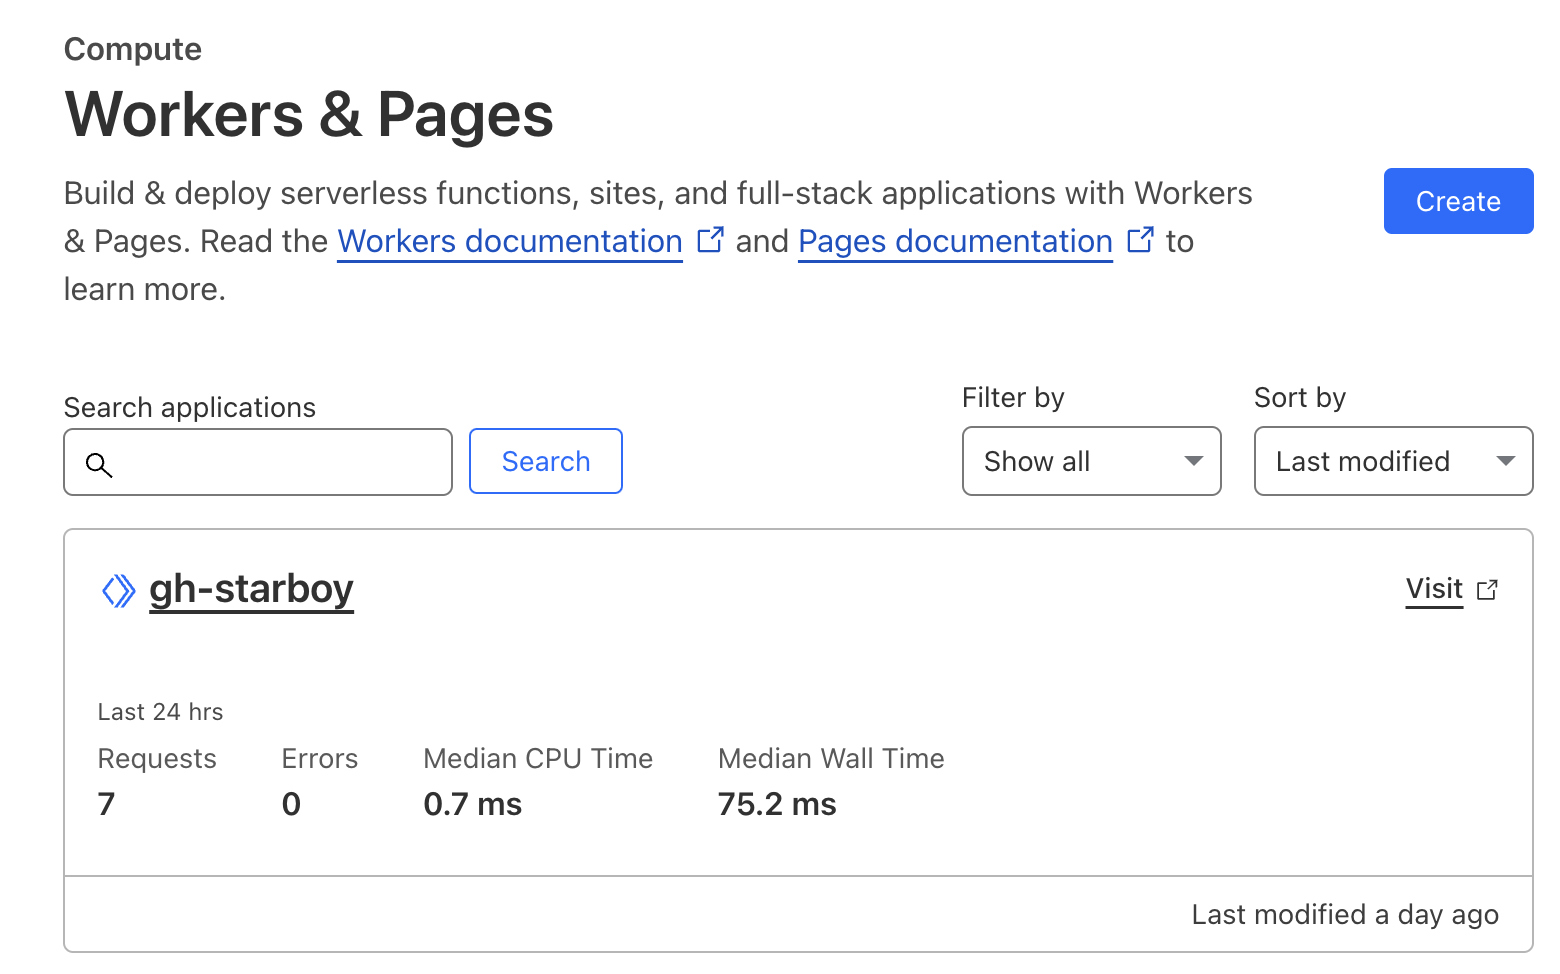
Once the code is deployed, Cloudflare will automatically create a URL for your worker, that is in the format {project-name}.{your-account-name}.workers.dev.
Once you deploy your worker function, you can update the Github webhook with the real Cloudflare worker URL.
Disclaimer: At the time of writing this (02/2025), Deno 2.0 is not yet well supported by Denoflare, so you might need to check this conversation if you’re facing issues. In fact, it also doesn’t support some of the latest Cloudflare features (e.g. logging), making the whole tool a bit of a pain in the ass to work with. In all honesty, this was only a pet project so I don’t really care, but next time I’d definitely use the official Wrangler package.
Get a Telegram API token
Now that we have the worker deployed and the webhook listening, we can finalize the script by adding the Telegram messages.
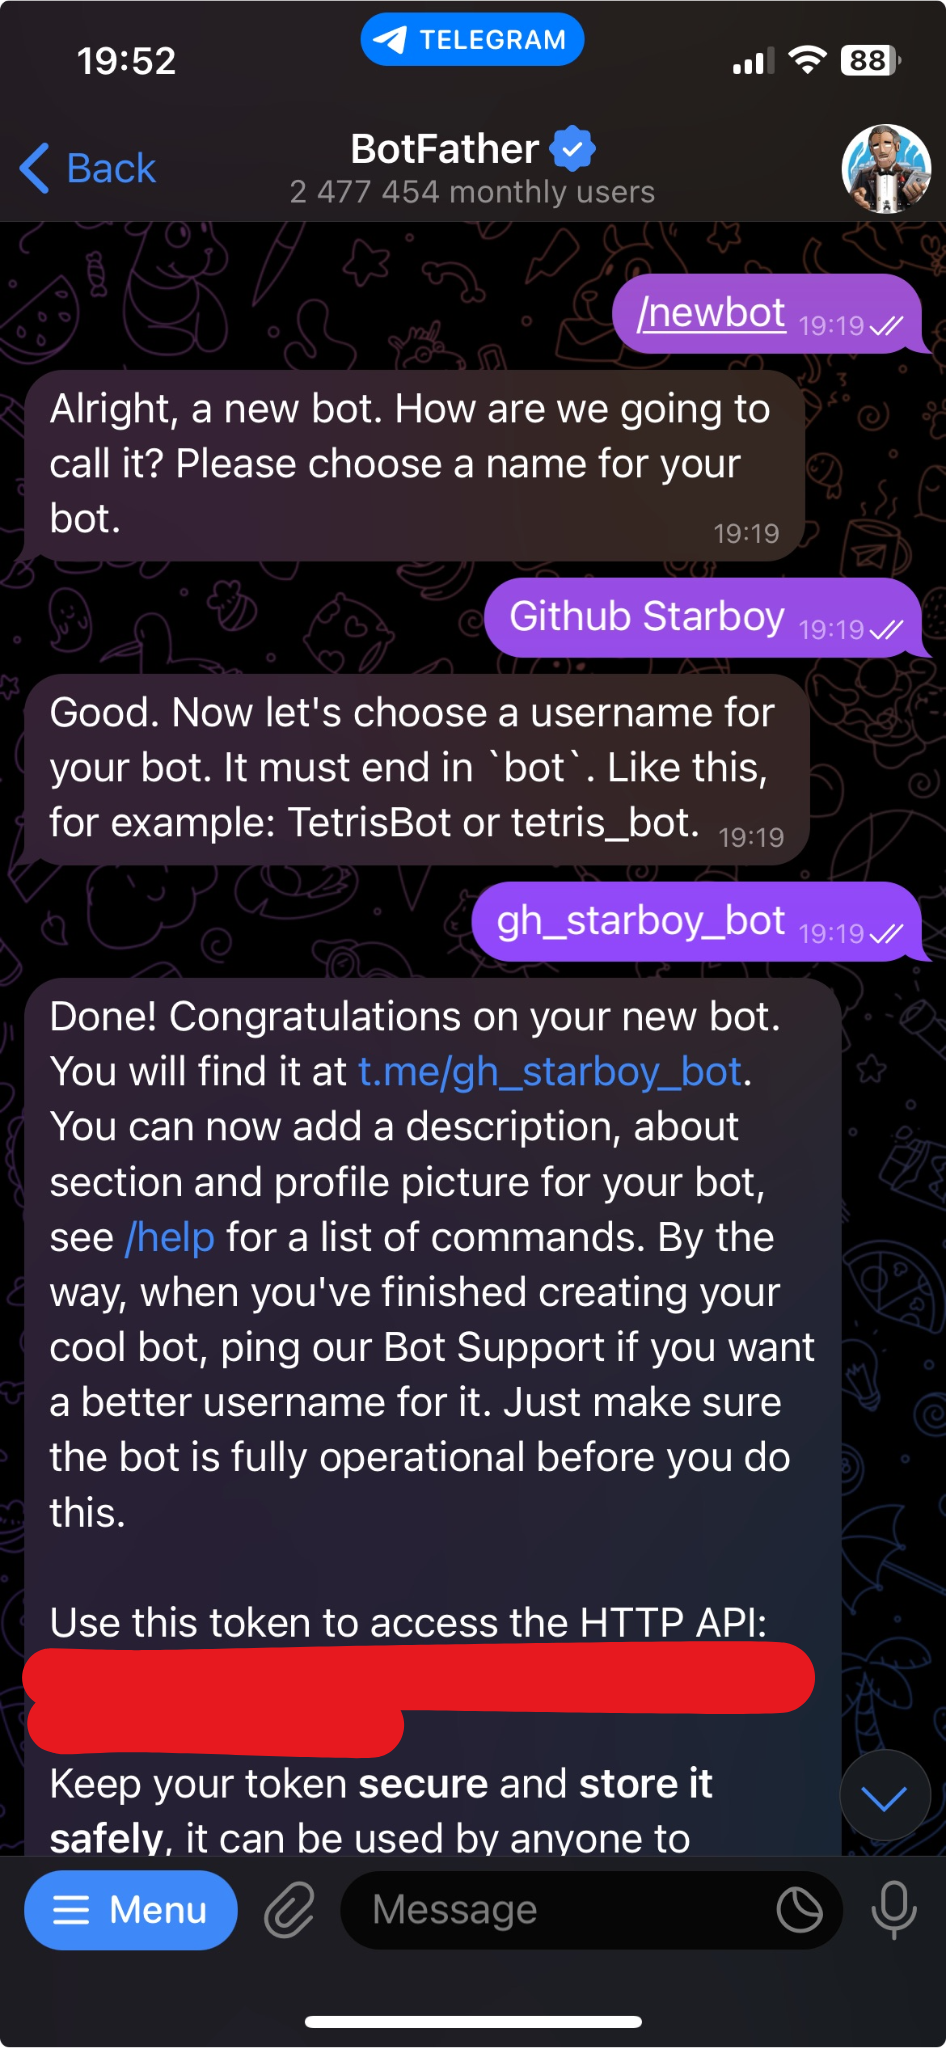
The first thing you will need to do is create a Telegram bot. This can be easily done, if you search for @BotFather in your Telegram and then send a message /newbot. Then just choose a bot name and BotFather will respond with an API token (simple as that).
Now, in order to get the ID of the chat between you and your newly created bot, send a random message in the conversation. Then, open this URL in your browser https://api.telegram.org/bot{BOT_API_TOKEN}/getUpdates and find the chat.id.
This is everything we need to be able to send messages. The following piece of code will call Telegram’s sendMessage endpoint that sends a message to our Telegram conversation 🎉.
const res = await fetch(
`https://api.telegram.org/bot{BOT_API_TOKEN}/sendMessage`,
{
method: 'POST',
headers: {
'Content-Type': 'application/json',
},
body: JSON.stringify({
chat_id: '{CHAT_ID}',
text: 'Hello, this is a message from the bot',
}),
},
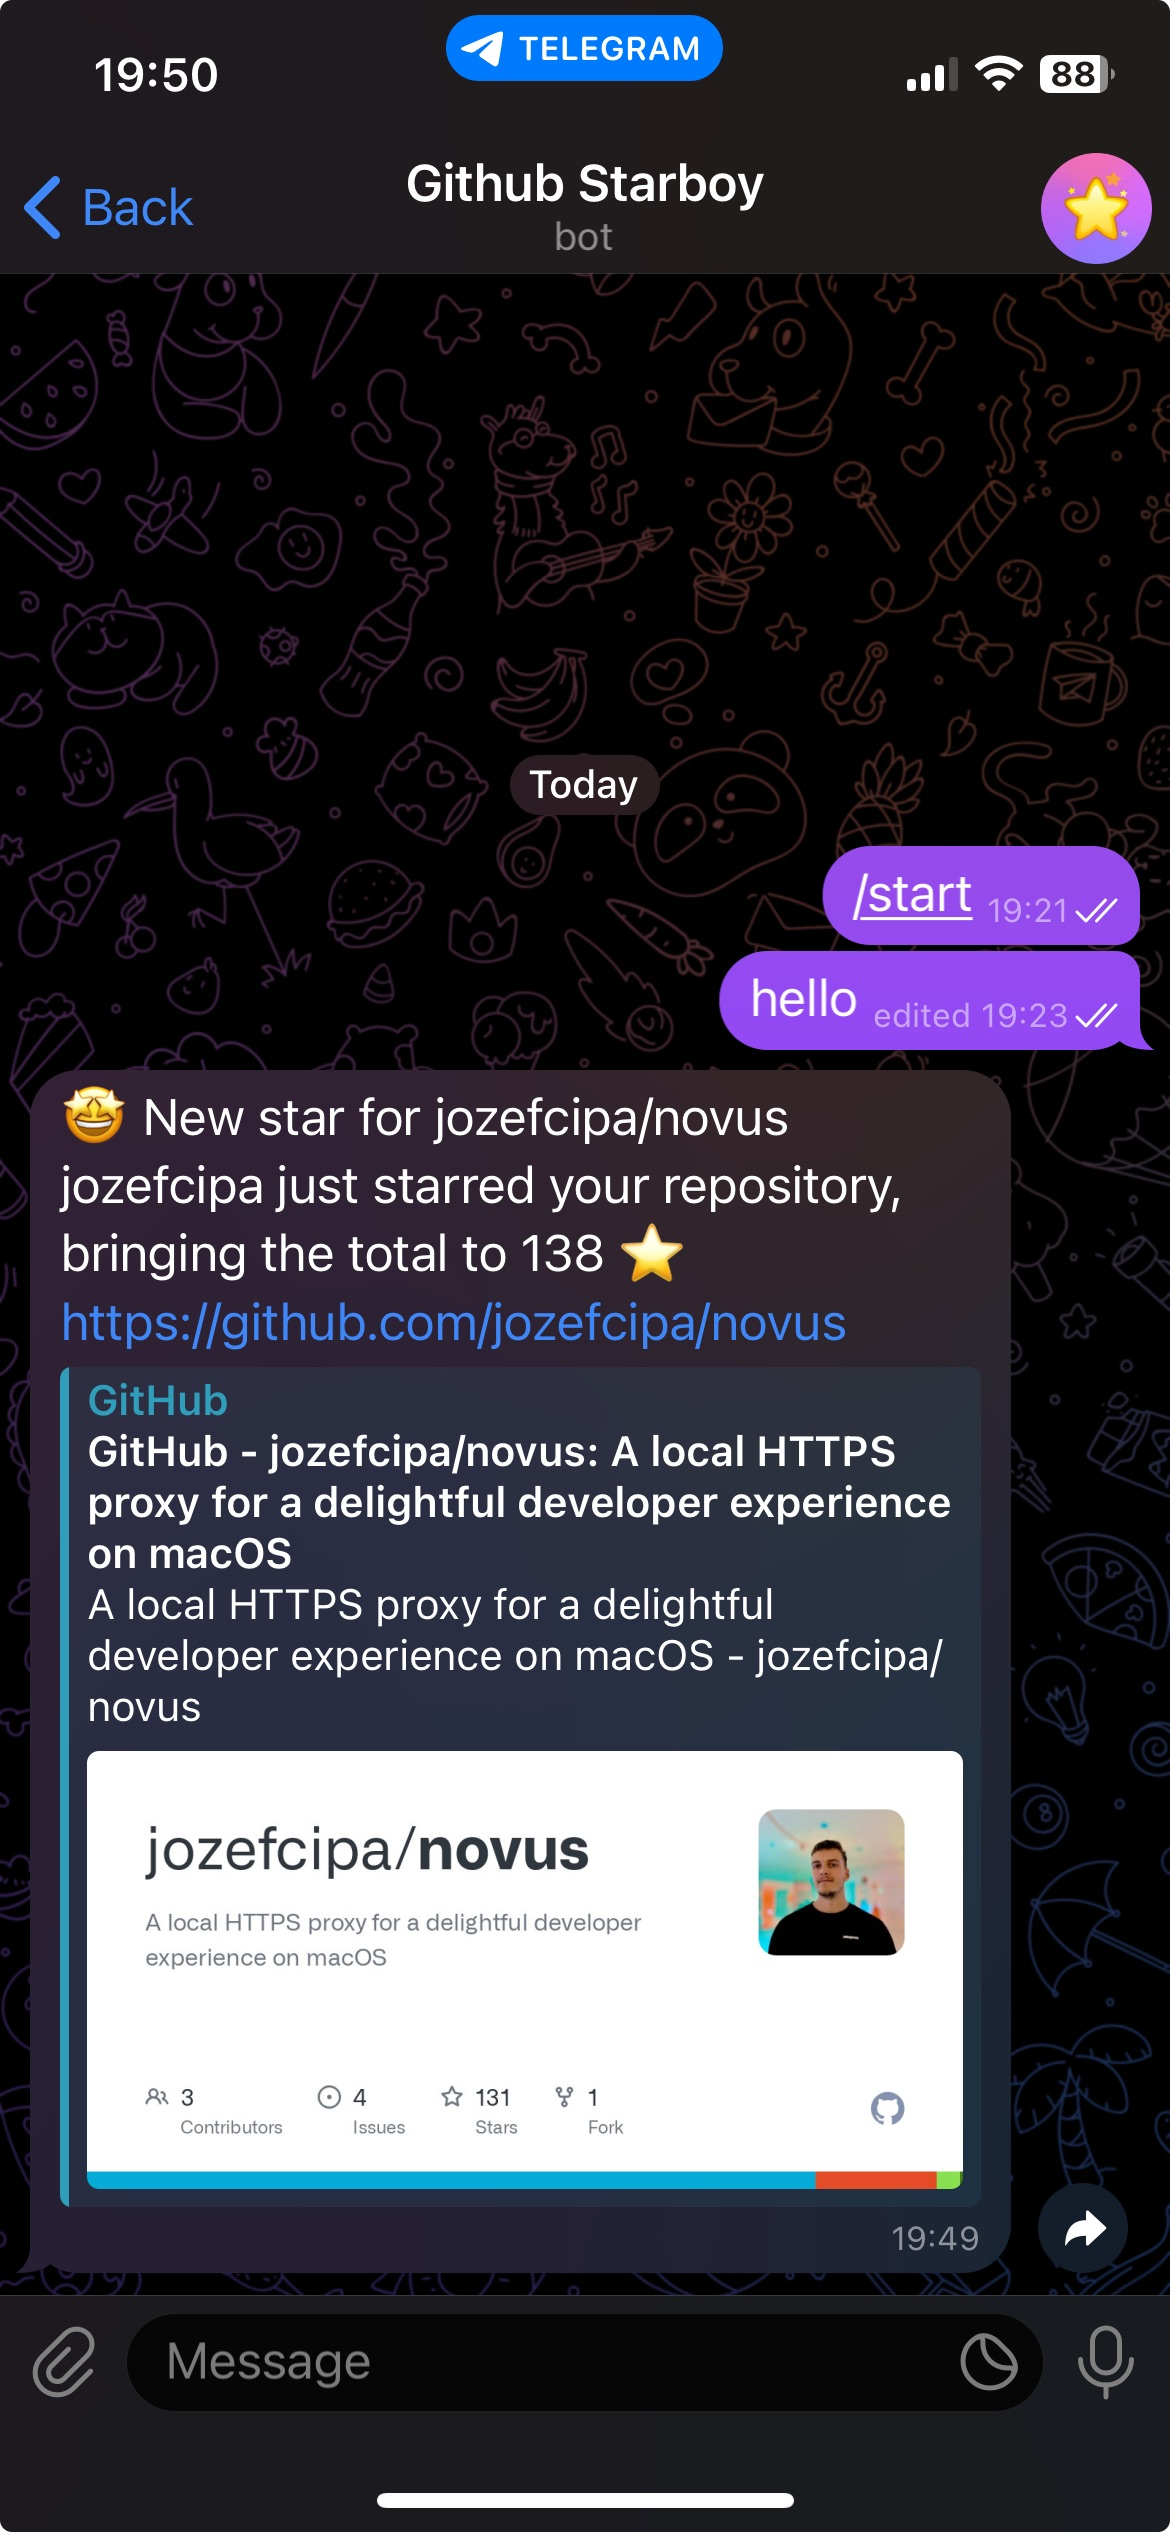
)Now, if someone adds a star to your repository, you will get a Telegram message like follows 🎉. This means I can finally attempt to ignore my OCD knowing that I’ll be automatically notified of every new star 😆.
Disclaimer 2: Telegram API docs are quite shitty, so thanks to @dideler for this awesome Github gist detailing all the necessary steps.