As developers, we often need to use many different programs for our job. There are various ways to install these applications, one of the most popular being Homebrew. It is advertised as “the missing package manager for macOS” (and Linux) and it certainly does a great job there. But have you ever wondered how it works under the hood and how can one add their custom binary into it?
In this post, we will learn how to create and publish an application that can be installed via Homebrew. To illustrate, we will start by building a simple Go application.
Creating an application
Our application will be a simple binary that will greet the current user. Let’s start by initializing a new Go project.
Open your terminal and run:
$ mkdir go-hello-world && cd go-hello-world
$ go mod init github.com/{YOUR_GITHUB_USERNAME}/go-hello-world
After that, create a main.go file and copy-paste the following code:
// main.go

package main

import (
	"fmt"
	"os/user"
)

func main() {
	user, _ := user.Current()

	fmt.Printf("Hello %s!\n", user.Name)
}
After running go run main.go you should see a similar output in your terminal:
$ go run main.go
Hello Jozef Cipa!
This means the app is working and we can move forward.
Managing builds with GoReleaser
If you haven’t heard of it, GoReleaser is a handy tool for managing releases of your Go app. It helps with building, signing, and publishing application artifacts, and apart from the mentioned, we will use it to also generate a Homebrew configuration.
First of all, we need to install and initialize the library:
$ brew install goreleaser
$ goreleaser init
Running goreleaser init will create a .goreleaser.yaml configuration file that will contain a lot of predefined settings. There are many customization options available, but we will go through the file and clean it up a bit, giving us something like this:
# .goreleaser.yaml
version: 1
before:
  hooks:
    - go mod tidy
builds:
  - env:
      - CGO_ENABLED=0
    goos:
      # We only want a macOS binary
      - darwin
archives:
  - format: tar.gz
    # this name template makes the OS and Arch compatible with the results of `uname`.
    name_template: >-
      {{ .ProjectName }}_
      {{- title .Os }}_
      {{- if eq .Arch "amd64" }}x86_64
      {{- else if eq .Arch "386" }}i386
      {{- else }}{{ .Arch }}{{ end }}
      {{- if .Arm }}v{{ .Arm }}{{ end }}
changelog:
  filters:
    exclude:
      - "^docs:"
  groups:
    - title: Features
      regexp: '^.*?feat(\([[:word:]]+\))??!?:.+$'
      order: 0
    - title: "Bug fixes"
      regexp: '^.*?fix(\([[:word:]]+\))??!?:.+$'
      order: 1
    - title: Others
      order: 999
With this setup GoReleaser will also generate a changelog based on our commits, therefore it is recommended to use conventional commits.
The next step after configuring GoReleaser is to create a GitHub repository and generate a personal access token (PAT) for authentication.
Now, we can finally create a release of our application and push it to Github.
# First let's commit and create a Git tag
$ git add .
$ git commit -m 'feat: add goreleaser'
$ git tag -a v0.0.1

# Next, push code and tags to GitHub
$ git push origin main --follow-tags

# Now we can create a release 🚀
$ GITHUB_TOKEN={YOUR_GITHUB_TOKEN} goreleaser release
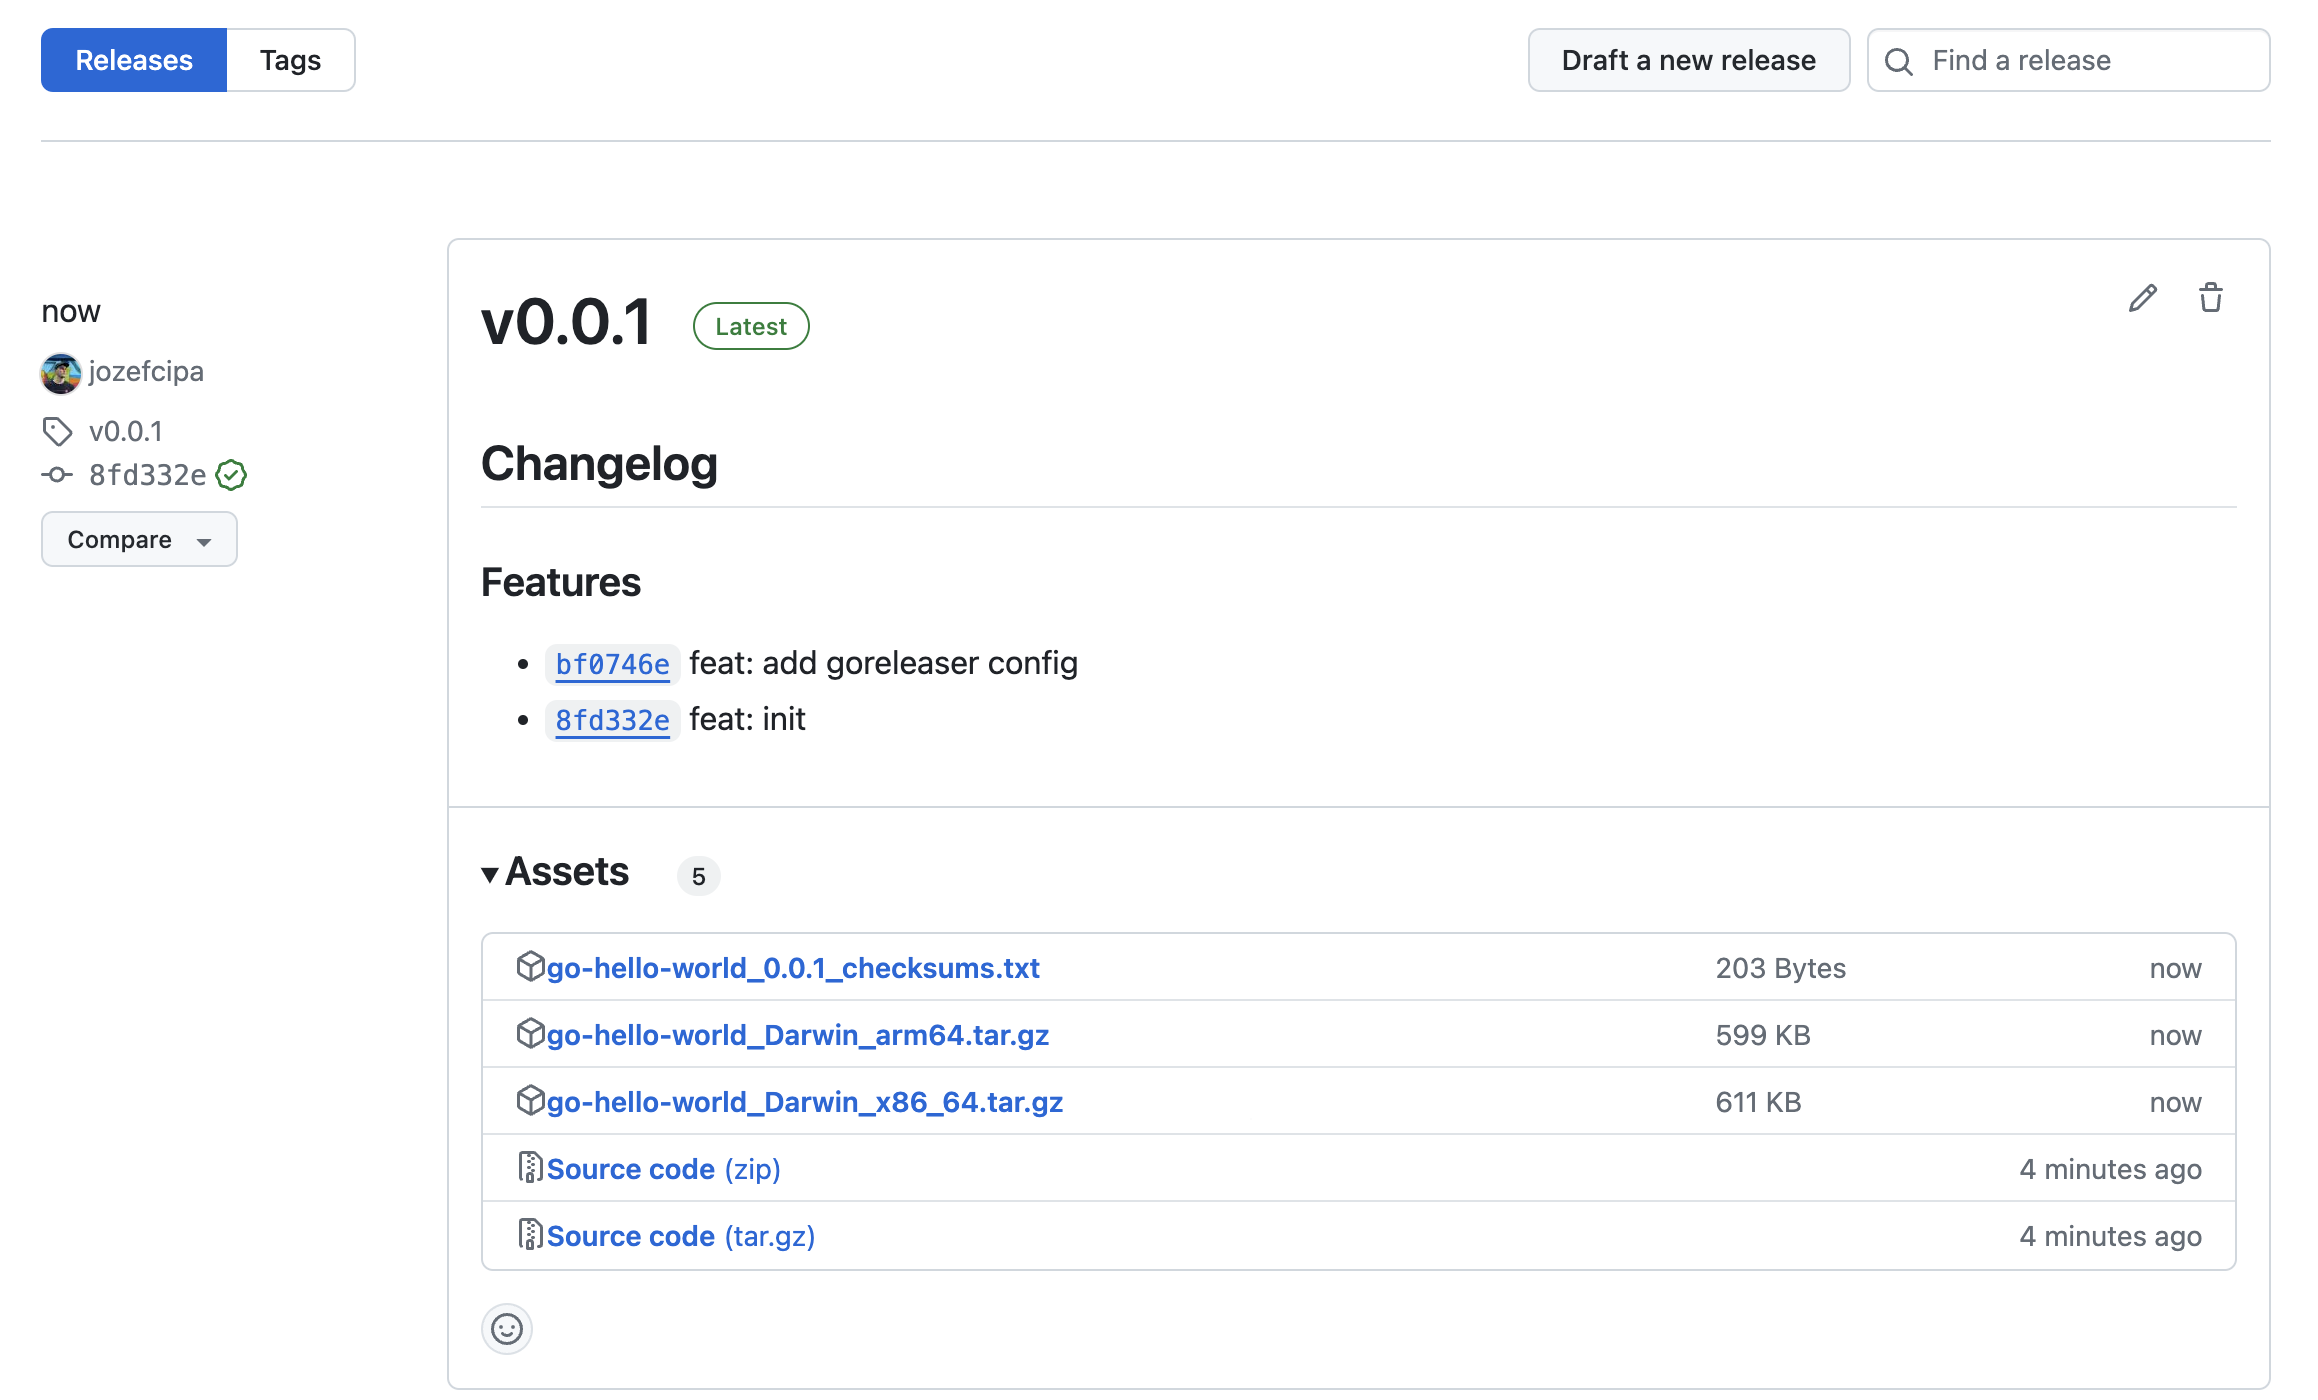
If everything went well, you should now see a new release in your GitHub repository (https://github.com/{YOUR_GITHUB_USERNAME}/go-hello-world/releases).
Configuring GoReleaser for Homebrew
Homebrew uses formulas, written in Ruby, to describe how software should be installed. These formulas are stored in repositories called taps, which can be either core (official) or custom. Users can add custom binaries to Homebrew by creating their own taps and writing formulas to manage the installation process of their applications. This is exactly what we are going to do now.
To integrate Homebrew with GoReleaser, we will add the following configuration to the .goreleaser.yaml configuration:
brews:
  - name: go-hello-world
    homepage: "https://github.com/{YOUR_GITHUB_USERNAME}/go-hello-world"
    description: "Example Go Binary"
    license: "MIT"

    url_template: "https://github.com/{YOUR_GITHUB_USERNAME}/go-hello-world/releases/download/{{ .Tag }}/{{ .ArtifactName }}"
    download_strategy: CurlDownloadStrategy

    commit_author:
      name: goreleaserbot
      email: bot@goreleaser.com
    commit_msg_template: "chore(release): brew formula update for {{ .ProjectName }} version {{ .Tag }}"
    repository:
      owner: {YOUR_GITHUB_USERNAME}
      name: homebrew-go-hello-world
      git:
        url: 'git@github.com:{YOUR_GITHUB_USERNAME}/homebrew-go-hello-world.git'
        private_key: '{{ .Env.GH_PRIVATE_KEY }}'
    directory: .

    # Setting this will prevent Goreleaser to actually try to commit the updated
    # formula - instead, the formula file will be stored in the dist directory
    # only, leaving the responsibility of publishing it to the user.
    # If set to auto, the release will not be uploaded to the homebrew tap
    # in case there is an indicator for prerelease in the tag e.g. v1.0.0-rc1
    skip_upload: 'auto'
Note, that this is just a simple basic configuration, there are plenty of other settings that you can adjust.
After updating the configuration, we need to create a GitHub repository to store our Homebrew formulas. The repository must start with the homebrew-* prefix, therefore, let’s make one named homebrew-go-hello-world.
Next, we create an SSH key that will be stored in the ~/.ssh directory. GoReleaser needs it to push the generated Homebrew formula to the repository. Once you have the SSH key, make sure to register it in GitHub as well.
After that, we can use the following commands to create and publish a new application build.
# Commit & push the new changes
$ git commit -am 'feat: add homebrew config to goreleaser'
$ git tag -a v0.0.2
$ git push origin main --follow-tags
# Create a new release with GoReleaser and publish a Homebrew formula
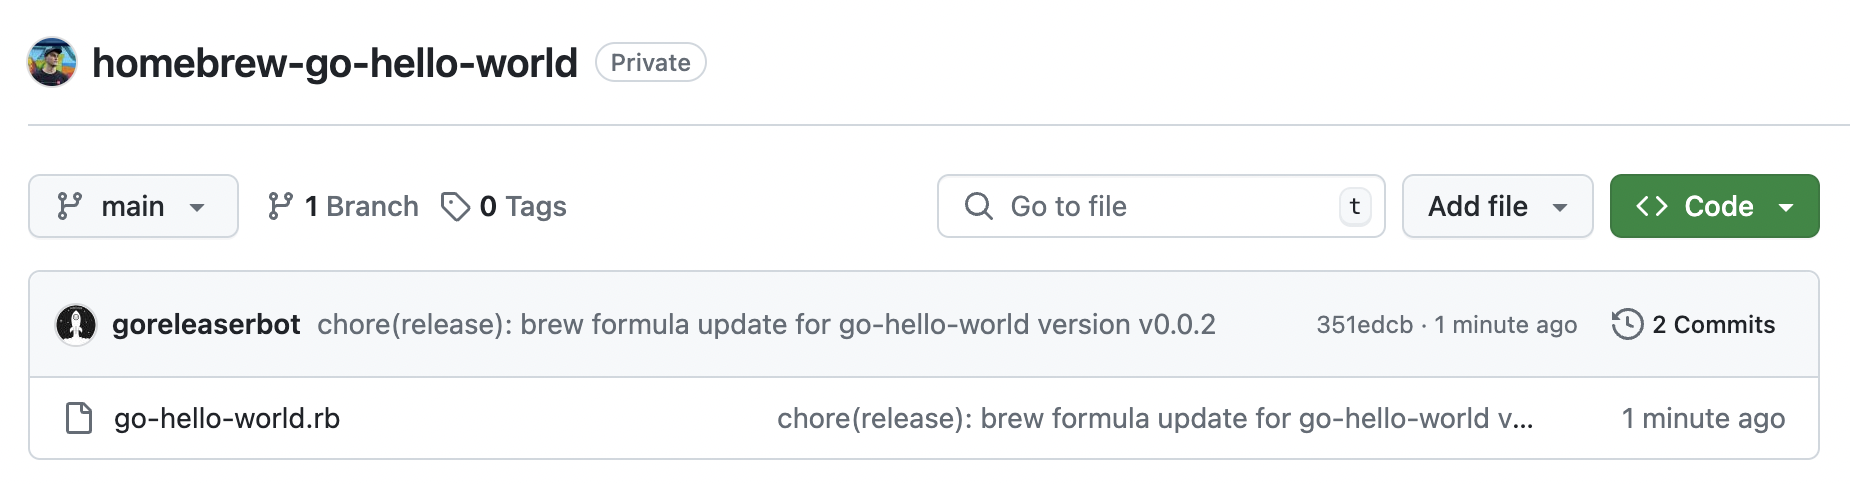
$ GITHUB_TOKEN={YOUR_GITHUB_TOKEN} GH_PRIVATE_KEY=~/.ssh/{YOUR_PRIVATE_SSH_KEY_NAME} goreleaser releaseIf everything succeeds we can go ahead and check the homebrew-go-hello-world repository. As you can see, GoReleaser created and pushed one Ruby file - this is our Homebrew formula.
If you open the file, you should see something similar to this:
# go-hello-world.rb

# typed: false
# frozen_string_literal: true

# This file was generated by GoReleaser. DO NOT EDIT.
class GoHelloWorld < Formula
  desc "Example Go Binary"
  homepage "https://github.com/jozefcipa/go-hello-world"
  version "0.0.2"
  license "MIT"
  depends_on :macos

  if Hardware::CPU.intel?
    url "https://github.com/jozefcipa/go-hello-world/releases/download/v0.0.2/go-hello-world_Darwin_x86_64.tar.gz", using: CurlDownloadStrategy
    sha256 "a2054be3846e834e7a620886671ff29f7879981a3c61635c909abed8ecc28f42"

    def install
      bin.install "go-hello-world"
    end
  end
  if Hardware::CPU.arm?
    url "https://github.com/jozefcipa/go-hello-world/releases/download/v0.0.2/go-hello-world_Darwin_arm64.tar.gz", using: CurlDownloadStrategy
    sha256 "ef73550058976ddf82a578a0f5fd19e755b168ea38f0fc30835acc541ca1aae3"

    def install
      bin.install "go-hello-world"
    end
  end
end
As you can see, based on our .goreleaser.yaml config, it created binaries for macOS for both CPU architectures. The links point to the v0.0.2 release of our main go-hello-world repo from where Homebrew will download the relevant binary. Our formula is fairly simple and only contains instructions for downloading and saving the binary to the correct folder. However, many more customization options are available for configuring more advanced scenarios.
Installing our binary
Here comes the best part - installing our binary. Now that we have a formula ready, we can install it. As we mentioned before, Homebrew supports two repositories: official ones, stored in Homebrew/homebrew-core, and custom repositories created by third parties. Therefore, we need to tell Homebrew about our repository first. This is done using the brew tap command. As the official docs explain:
brew tap <user>/<repo>makes a clone of the repository athttps://github.com/<user>/homebrew-<repo>into$(brew --repository)/Library/Taps. After that,brewwill be able to work with those formulae as if they were in Homebrew’s homebrew/core canonical repository.
You can install and uninstall them withbrew [un]install.
Following the docs, we install our binary by running:
$ brew tap YOUR_GITHUB_USERNAME/go-hello-world
$ brew install go-hello-world
Once Homebrew installed the app, we can verify that it works properly:
$ go-hello-world
Hello Jozef Cipa!
If you see a similar result in your terminal, congratulations!
You’ve successfully created and published a Homebrew binary 🎉
Bonus - Automating releases with GitHub Actions
If you’ve read the whole article up to this point, here’s a little extra for you. We can simplify and automate the whole process by setting up a GitHub Actions job.
Create a new file called .github/workflows/release.yml and add the following code:
# .github/workflows/release.yml
name: GoReleaser
on:
  push:
    tags:
      - '*'
permissions:
  contents: write
jobs:
  goreleaser:
    runs-on: ubuntu-latest
    steps:
      - name: Checkout
        uses: actions/checkout@v4
        with:
          fetch-depth: 0
      - name: Set up Go
        uses: actions/setup-go@v4
      - name: Run GoReleaser
        uses: goreleaser/goreleaser-action@v5
        with:
          distribution: goreleaser
          version: '~> v1'
          args: release --clean
        env:
          GITHUB_TOKEN: ${{ secrets.GITHUB_TOKEN }}
          GH_PRIVATE_KEY: ${{ secrets.GH_PRIVATE_KEY }}
Don’t forget to set up a GitHub secret GH_PRIVATE_KEY and add the SSH key that we generated before. After that, you are all set for automated releases.
The GitHub action is triggered by pushing a Git tag, so whenever you want to publish a new app version, just create and push a new tag.
$ git tag -a vX.Y.Z
$ git push origin main --follow-tags
This will run the GoReleaser process, create a new binary, and push the updated formula to the Homebrew repository. Then, you can use brew commands to update your binary to the new version.
Happy coding and releasing :)