LaundryAlert - never forget your laundry again
A few months ago I was hanging my laundry after it stayed in the washing machine for half a day before I remembered I had forgotten to take it out. And this didn’t happen for the first time. Maybe it happened to you too. I got fed up and that’s when I got an idea.
What if there was a way to notify me whenever the washing cycle ends? How could I make sure I don’t forget to take out the laundry anymore? Maybe I could build a small device that would be watching the washing machine and send me a push notification on my phone when the cycle completes (there is a sign that lights up). The fact that I had an old unused OrangePi lying in my drawer for a couple of years motivated me even more to take on this project.
How will it work?
First of all, before even starting to work on my new side project, I had to verify whether it was even possible to send push notifications to my iPhone without building a regular iOS app. That would be too much work and I know nothing about iOS development.
Luckily, I knew about this concept called progressive web app (PWA), which allows you to create a website that can act as a native mobile app (to some extent). There are some limitations when it comes to the features that are supported, so I had to check if push notifications were working. I quickly drafted a very simple demo app and learned that it was possible. Game on!
The next step was to come up with the design of the whole project, and figure out how would it all work together, from reading the sign on the washing machine and processing it, to sending a notification to my phone.
After some thinking, this is what I came up with:
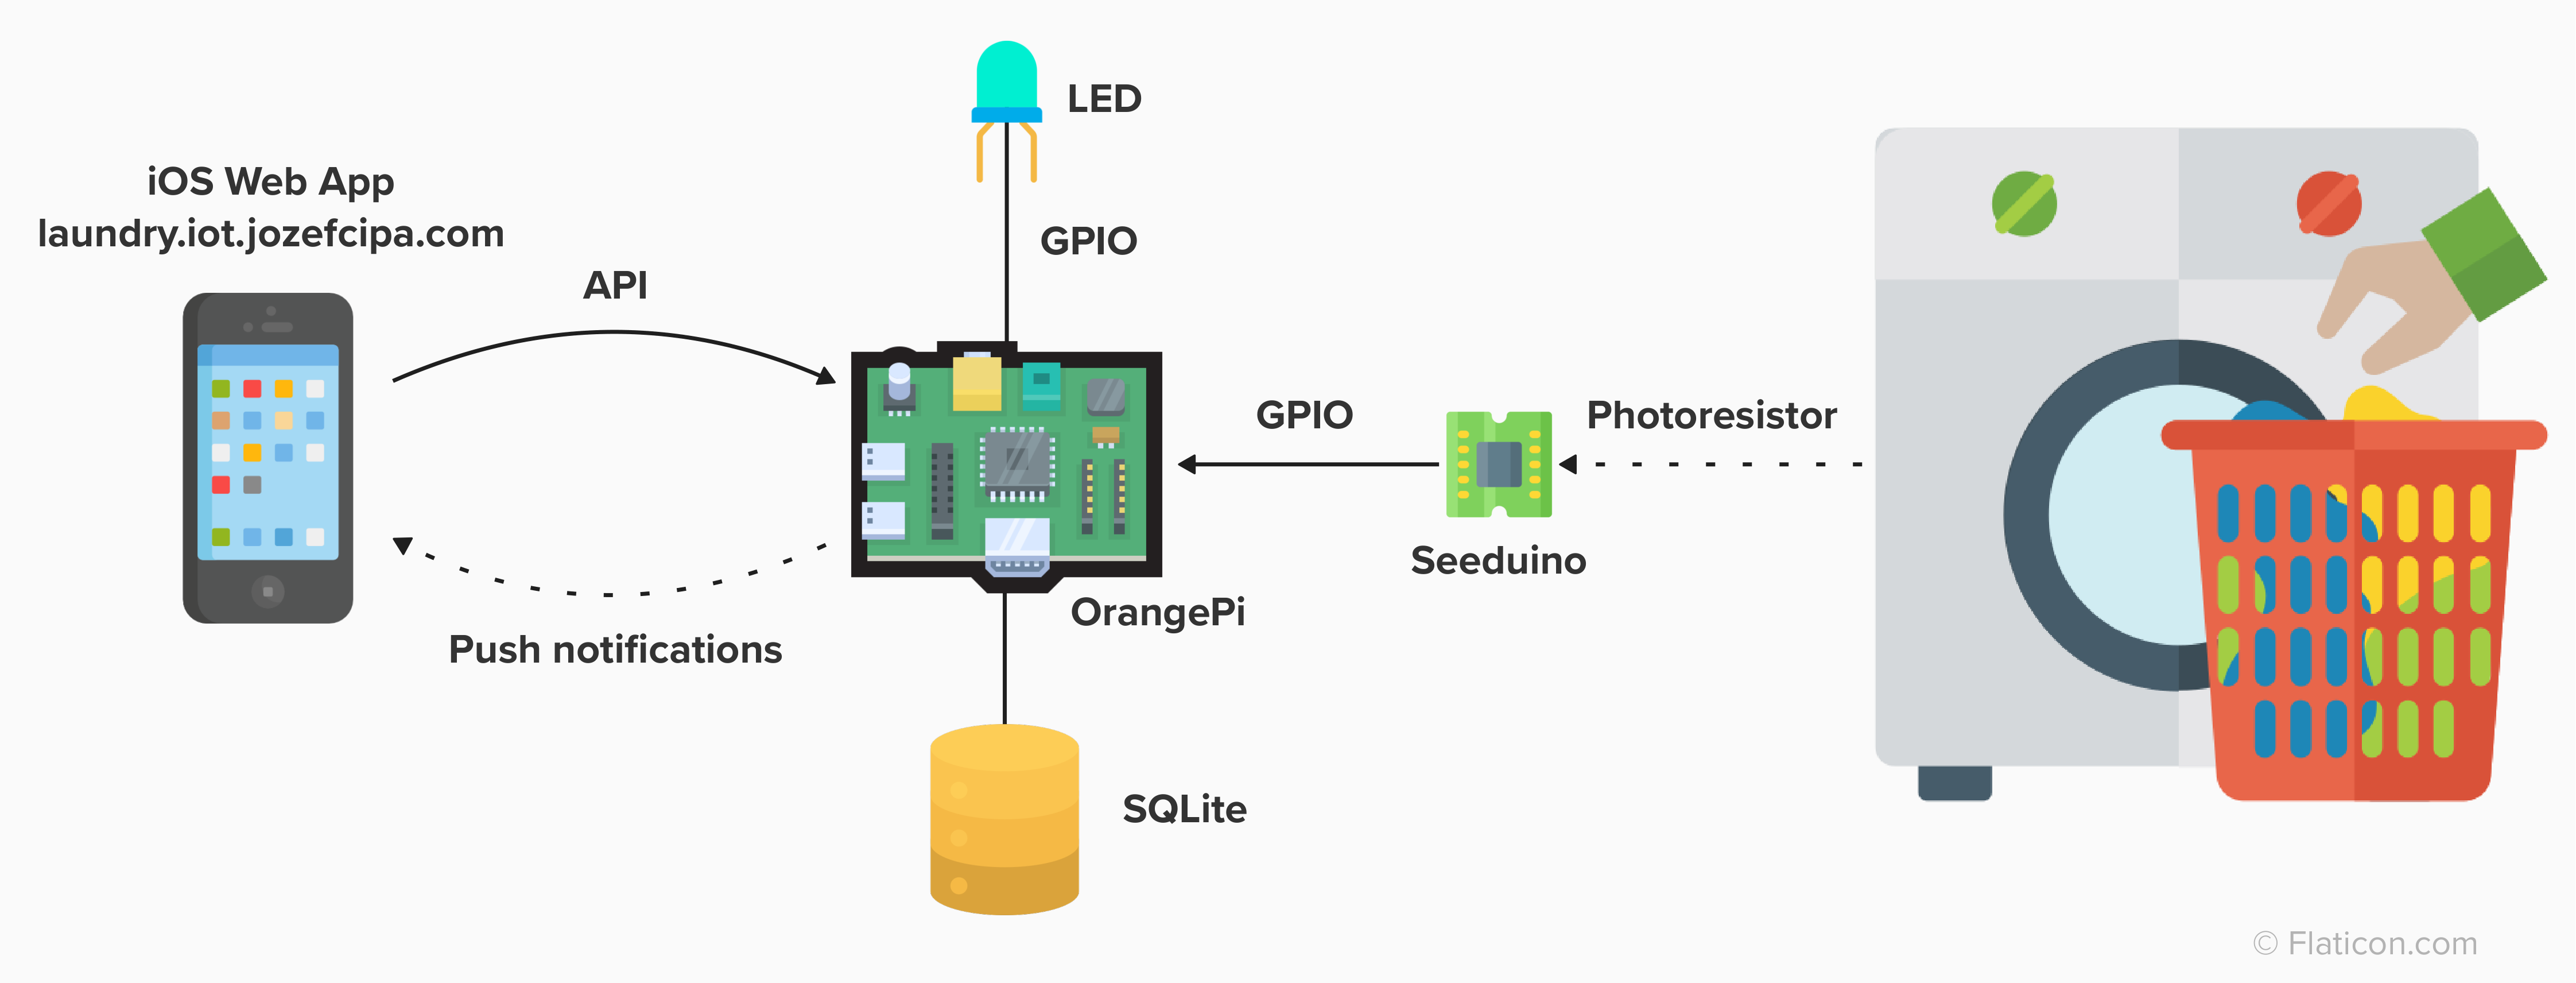
The whole project will consist of several independent parts that will communicate with each other.
First, we will have to create a simple website that will be then turned into a PWA and installed on the phone, this will be the user interface where users can see the actual state of the washing cycle and also register for the push notifications.
Then, we also need to add some electronics to read the light value from the washing machine. For this, we will use Arduino and a photoresistor.
Last but not least, a Node.js API, that will run on the mentioned OrangePi board and will take care of processing signals from Arduino and sending push notifications to the user’s device.
User interface (web client)
The website is quite simple, in fact, it only uses good old Javascript with no fancy libraries. The purpose of the app is just to provide a simple way for users to register their devices to receive push notifications.
It is deployed on the internet (laundry.iot.jozefcipa.com) so whenever we open the app on the phone, it loads and shows some screen. Once the website is loaded, a request is sent to 192.168.0.100 which is the address of our OrangePi where our API is running. If the URL is not available, then the user is probably not on a local network and an error message will appear. Otherwise, the app shows a button for subscribing to notifications.
But before opening the app on the phone, we have to first install it as a web app. This can be done by opening the website in Safari and tapping on Share → Add to Home Screen.


Watching the washing machine (Arduino)
Another important part of the whole project is the actual sensor that will monitor light changes on the washing machine dashboard. For that, we use a photoresistor that is taped to the light signaling the end of the washing cycle.
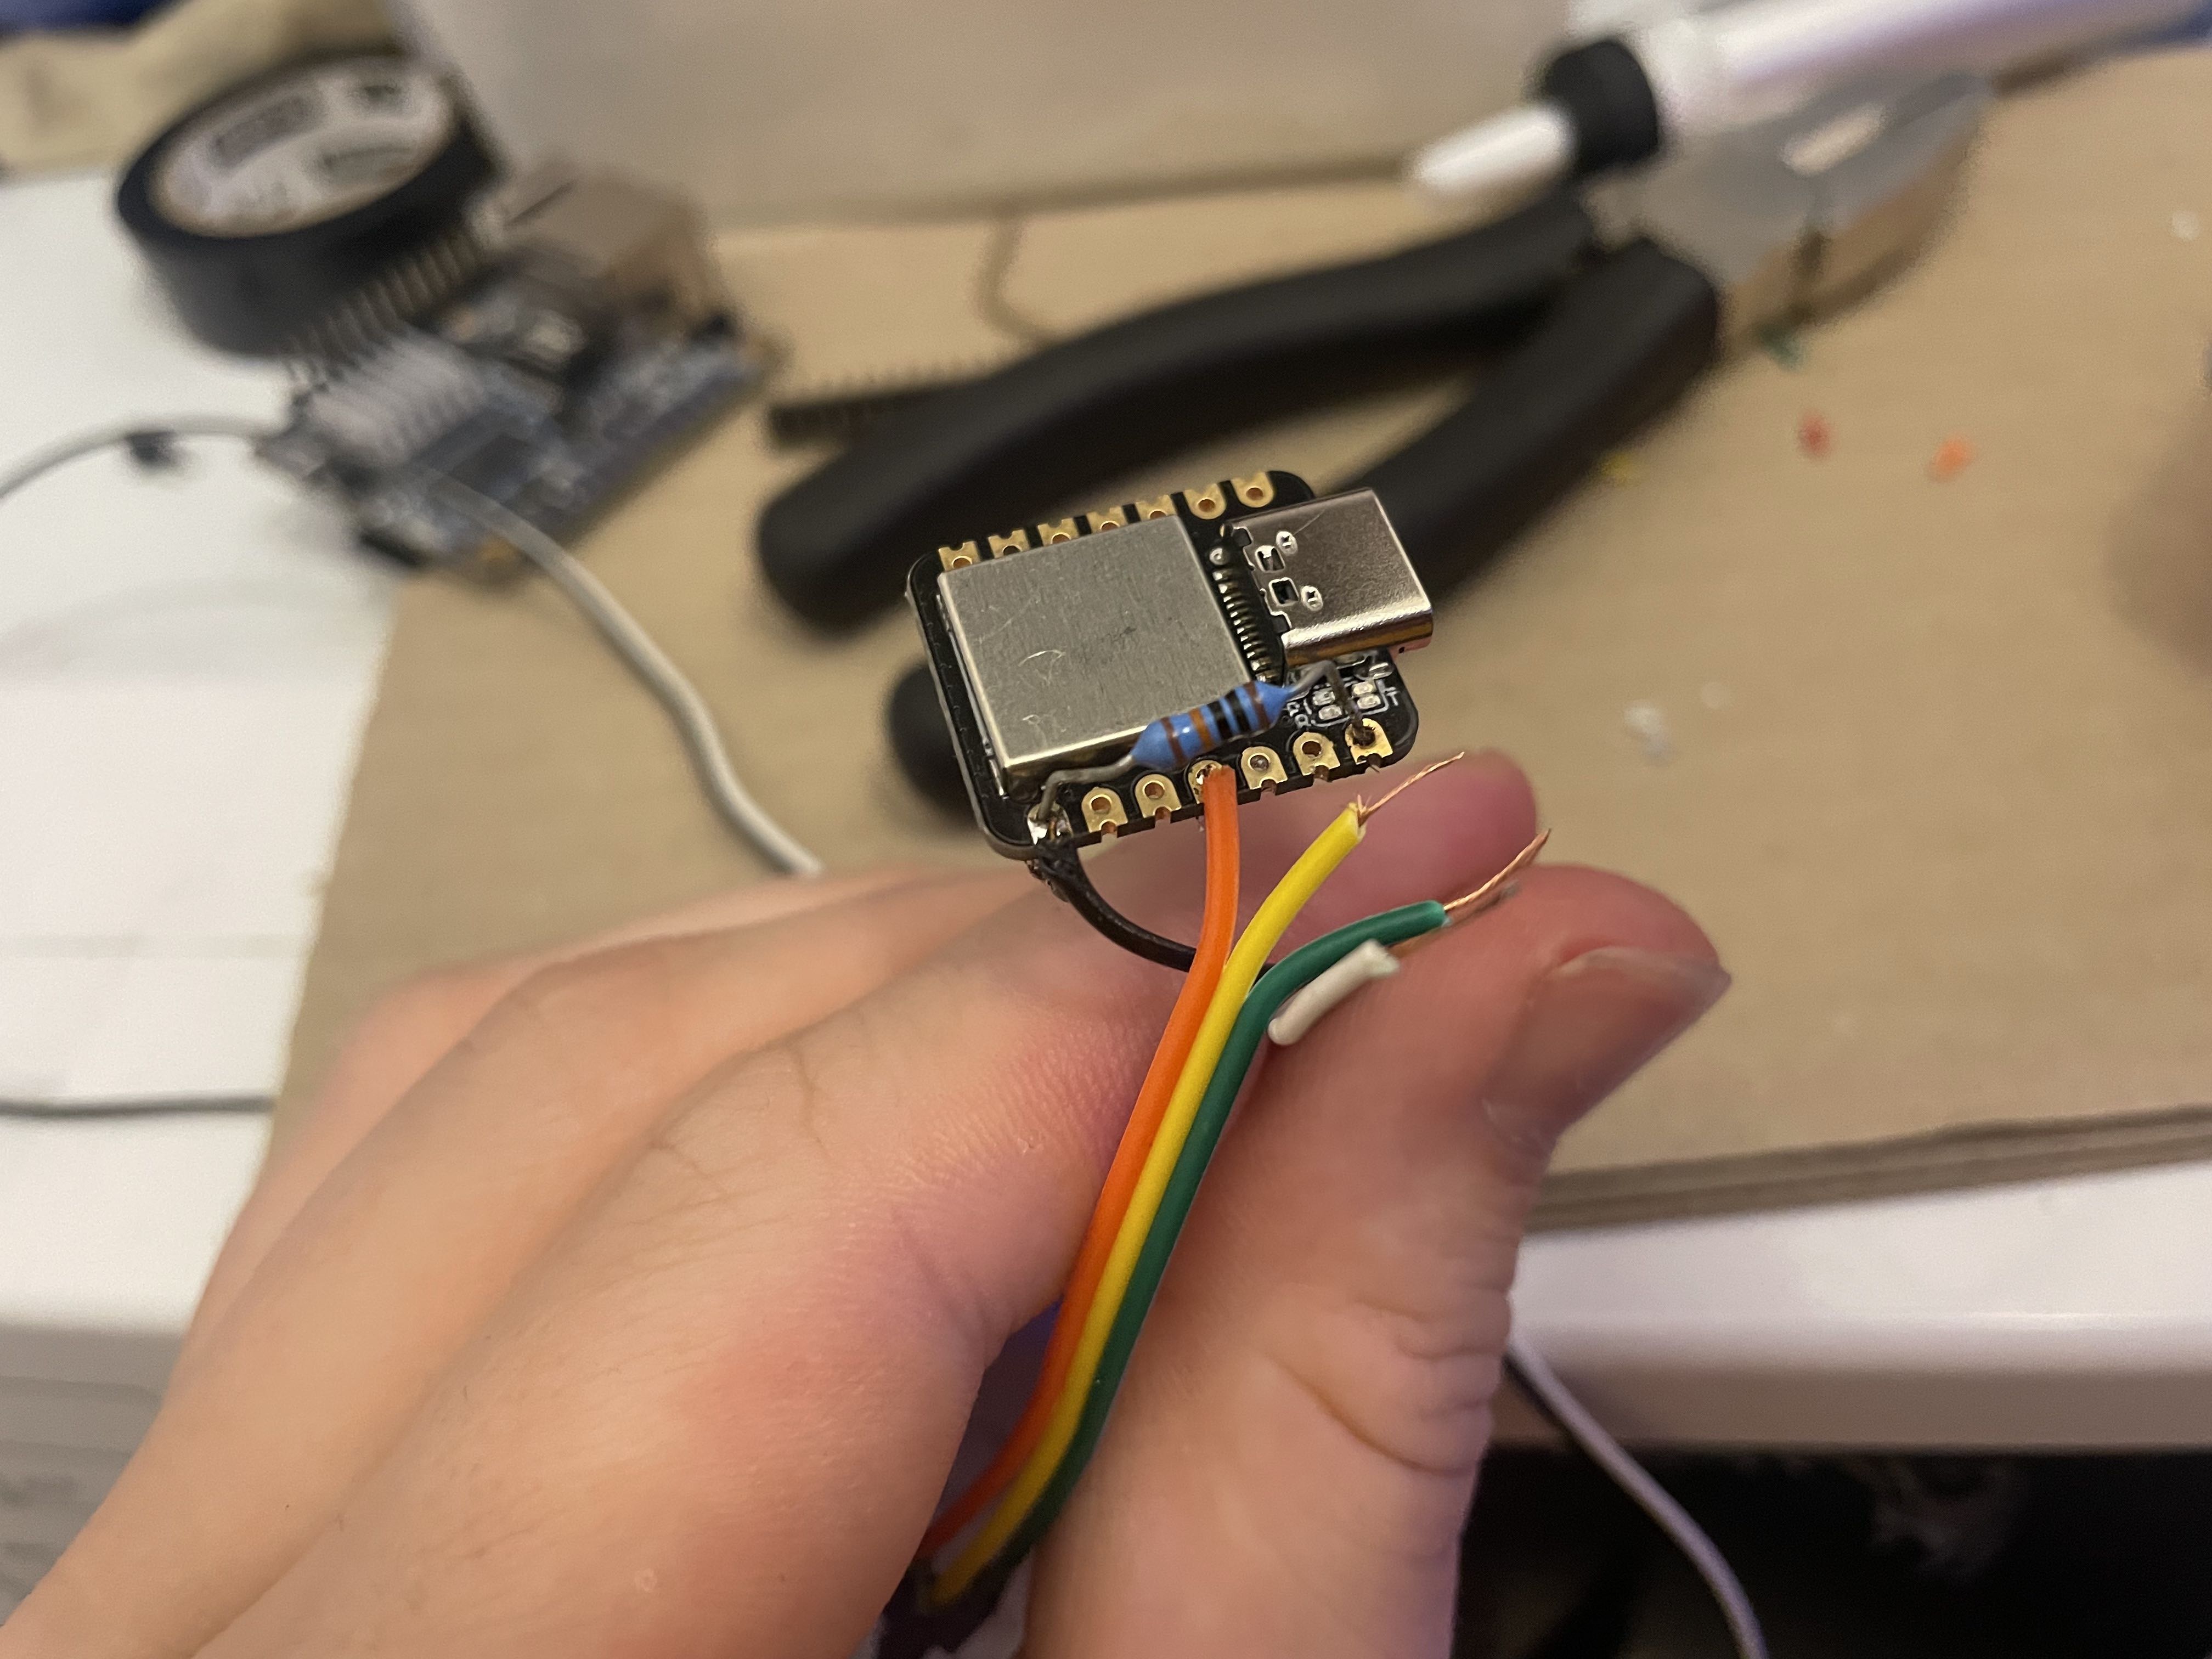
The value from the photoresistor is then read by the smallest and cheapest Arduino-compatible chip I could find - Seeduino XIAO. As you can see in the picture below, it is very compact. The code is very simple, it constantly checks the value from the photoresistor and based on the specified threshold returns either a 1 or a 0 on one of the output pins. This pin is then read by OrangePi for further processing.
You might ask if this intermediate chip is really necessary and why can’t we connect the photoresistor directly to the OrangePi board. Well, I tried that of course, but the problem with OrangePi GPIO pins is that they are digital, meaning they can only work with 0/1 values, so this wasn’t functioning well with the intensity of the washing machine light.
After that, I decided to buy an A/D converter chip (MCP3002) that converts analog values read from the photoresistor to digital values used by OrangePi. This solution, however, was a bit more complicated than I anticipated and I wasn’t able to make it work.
Since I’m really bad with electronics, I decided to go with maybe an overkill solution but the one I was certain would work - using an Arduino chip that I can easily program and tell it exactly what I want it to do. I am a programmer after all 🤷♂️.
Sending notifications (Node.js API)
The API is the control center of the whole application. It registers user notification tokens, periodically evaluates data from the sensor, and sends notifications to the users.
As it’s an API, I decided to use Express for the routing. It exposes two endpoints
GET /- Returns application status and uptimePOST /notifications/subscribe- Registers user’s notification token
The notification tokens are then stored in a SQLite database.
Notifications are sent using the web-push npm package that uses Web Push Protocol for sending push notifications to browsers.
Last but not least, the API has the concept of intervals - it’s a plain setInterval function being called periodically and performing some stuff. In our application, we use two of these
LED interval - every 2 seconds, it blinks the LED through the GPIO conveying that the application is working
Photoresistor interval - every 5 seconds, it reads the GPIO pin to see what the value from Arduino (1/0) is, and based on that it then decides whether to send the push notifications or not.
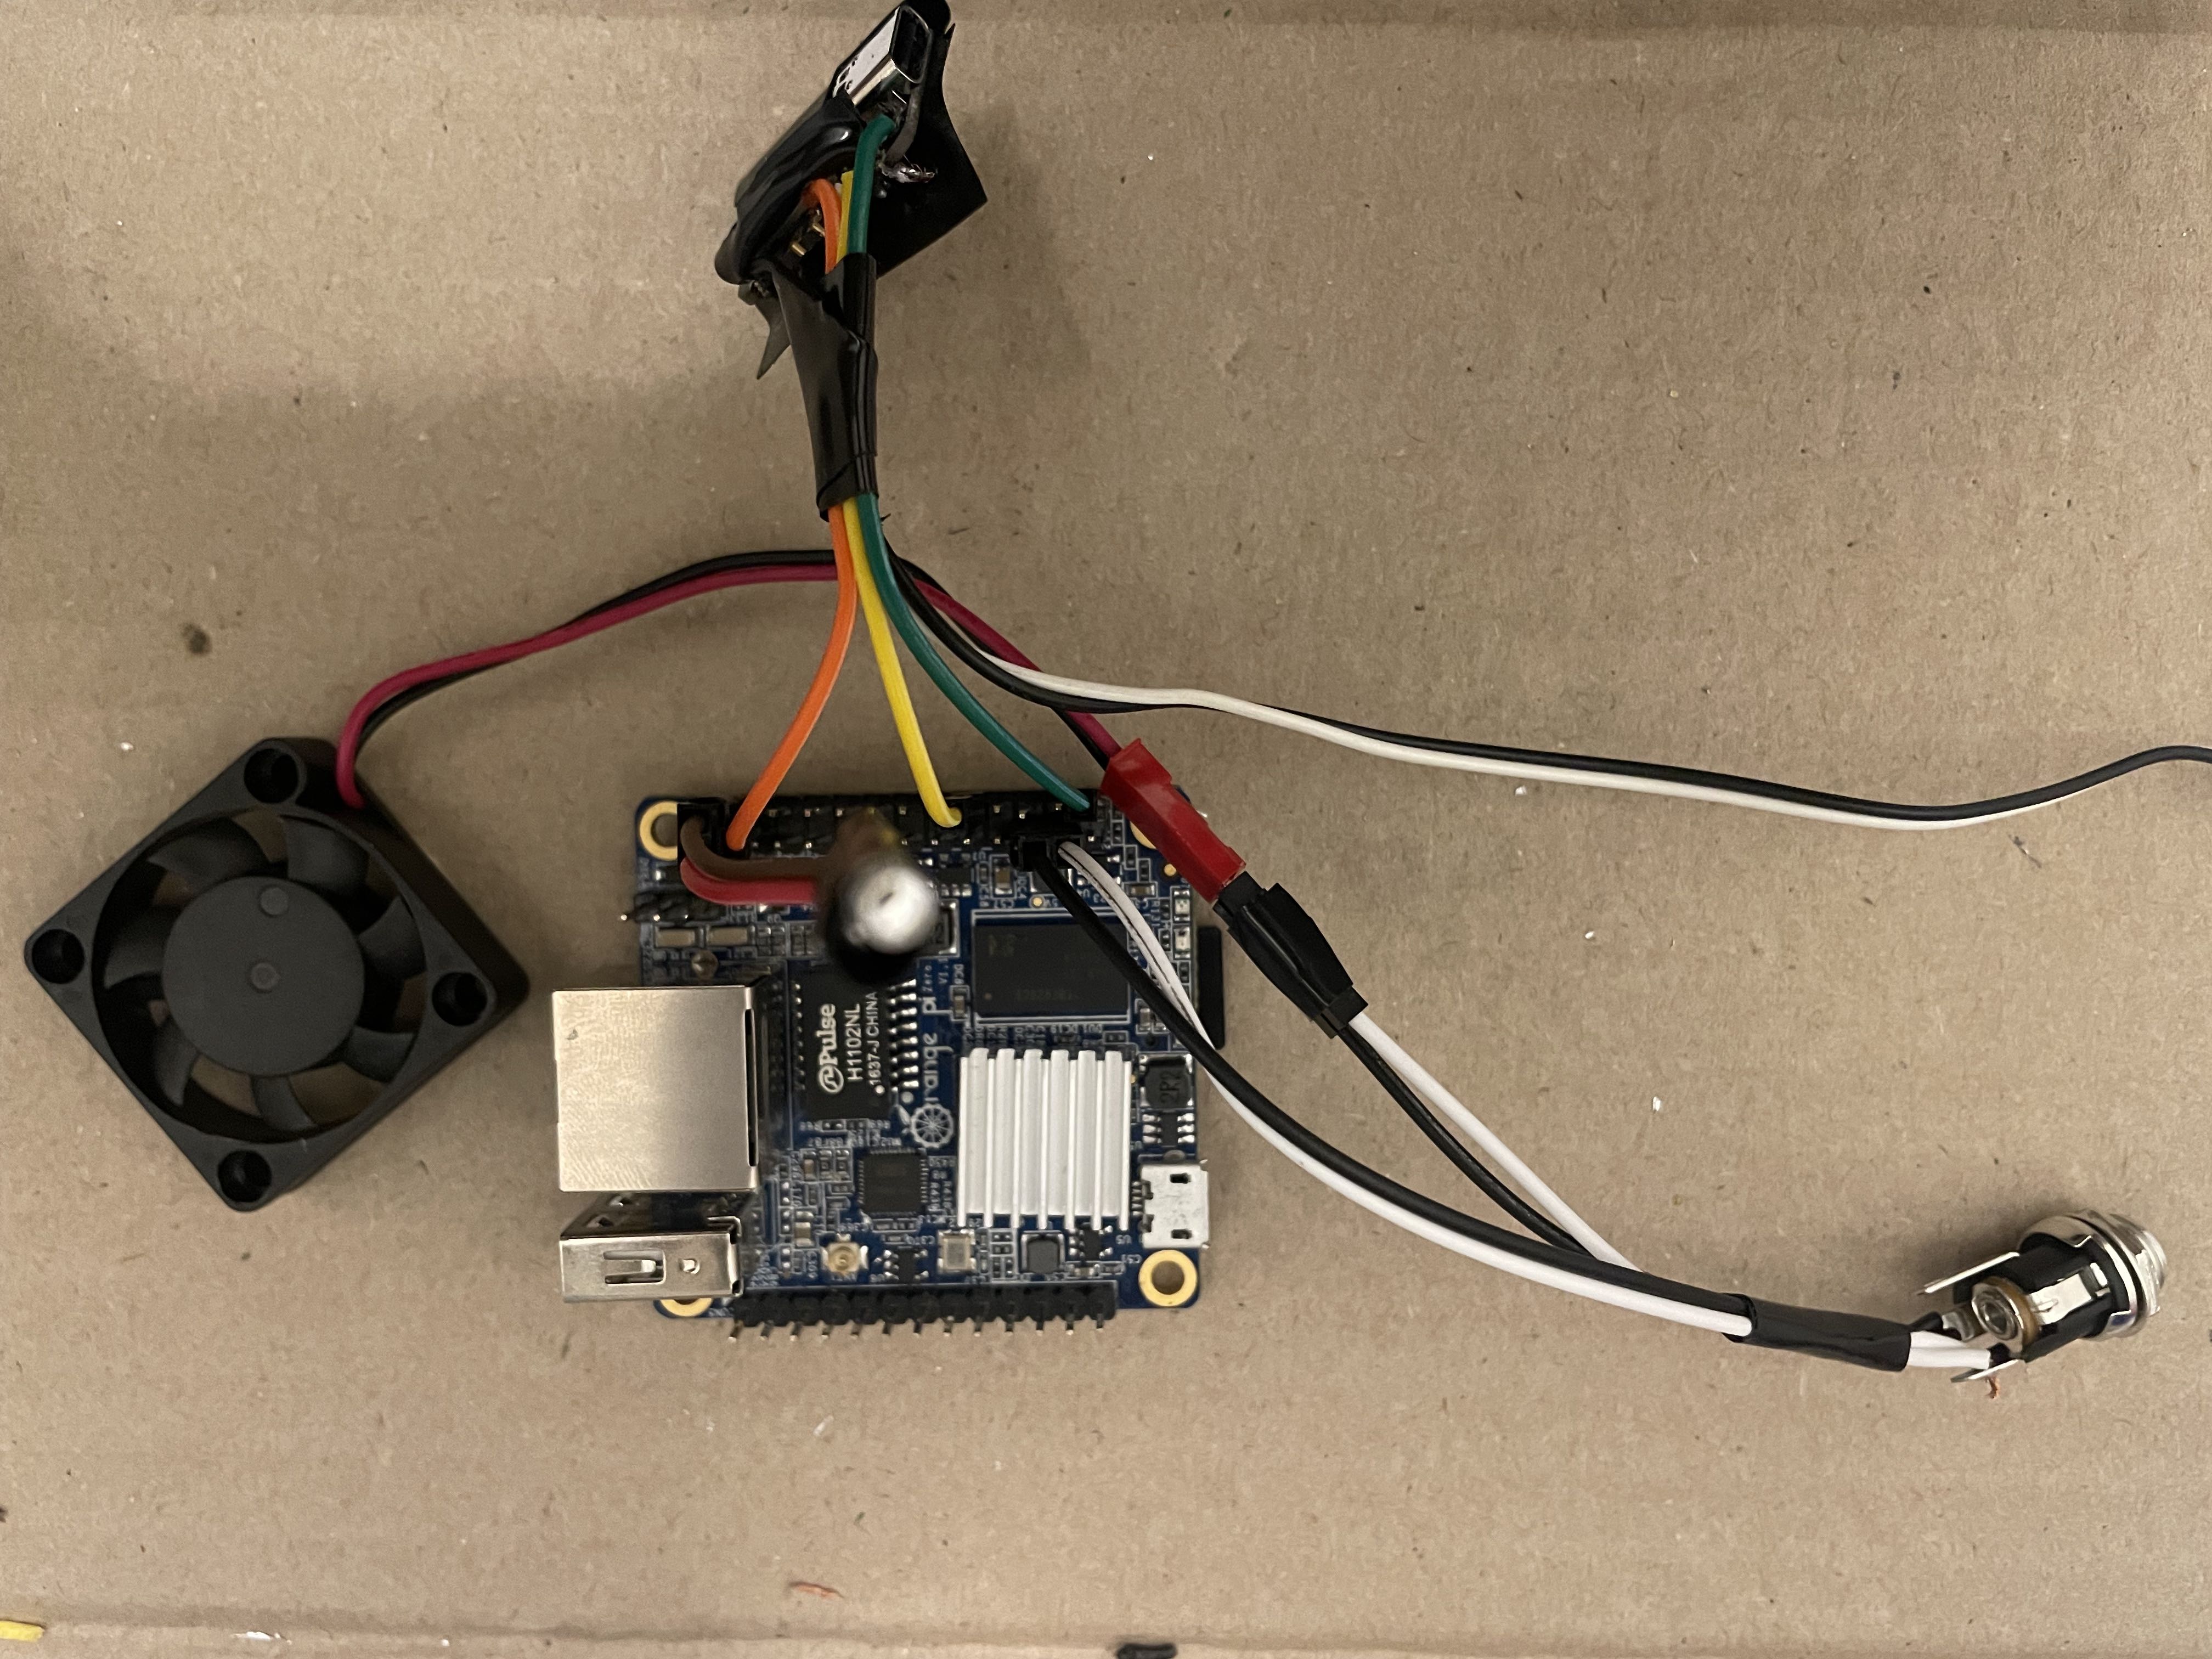
Putting it all together (OrangePi)
Now that we have the code ready, we can install everything on OrangePi.
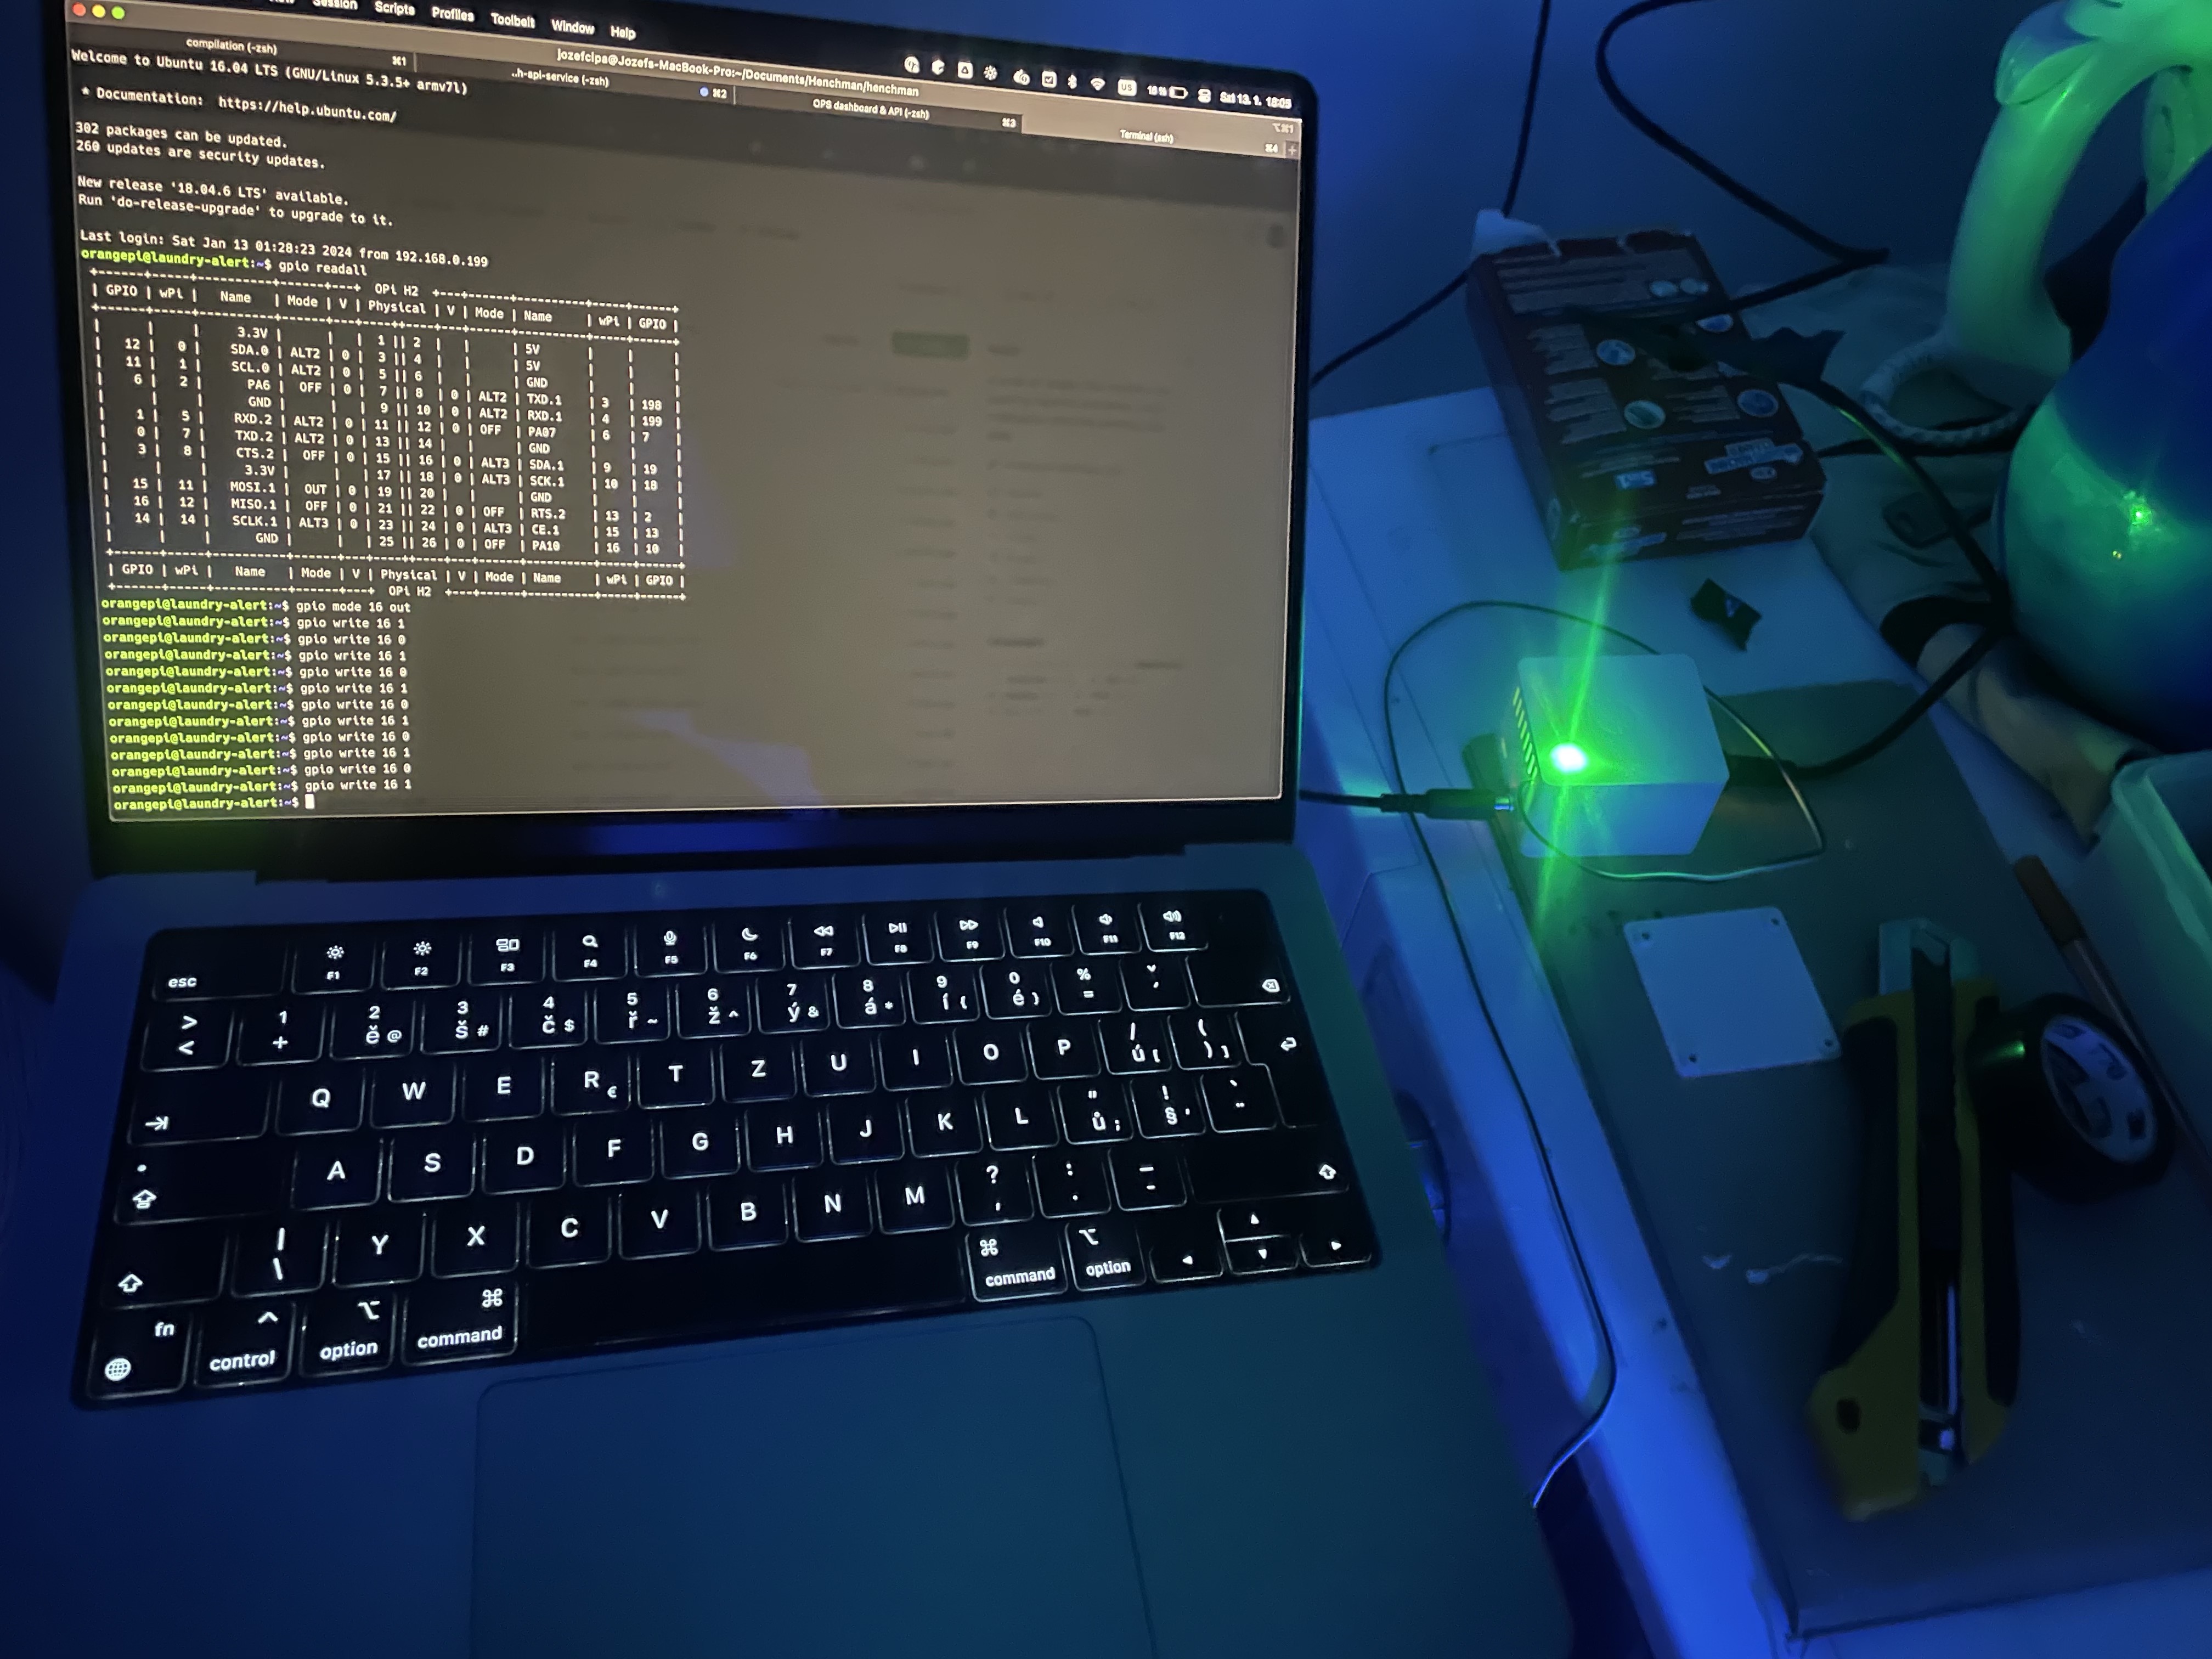
The first thing to do is to format the SD card and install Linux on it. After that, I installed Node.js, pm2 process manager, Nginx, and the GPIO library. As we want to be able to connect to the board remotely, I configured the static IP address and disabled the DHCP client.
The next important step was to configure GPIO pins. GPIO (General-Purpose Input Output) is a set of digital pins on an electronic circuit board that allows connecting other peripherals and is controllable by software. This gives us great power as we can write high-level code and communicate with custom electronic devices easily. We need two of these pins, one for the signaling LED (output) that will be blinking once the API starts and another one for reading the photoresistor data from Arduino (input).
As web apps on iPhones only allow HTTPS connections, I had to implement SSL certificates for the API. Since the API is running locally (and not on the internet) I couldn’t use any public free certificate authority, such as Let’s Encrypt but instead had to generate self-signed certificates. For that, I used an amazing tool called mkcert. However, as we generate custom certificates, these are naturally not recognized by browsers and they will complain and show the warning that the connection is not private.
Therefore, I had to first figure out how to register a custom certificate authority, so my self-signed certificates would be accepted in the browser. Luckily, mkcert does that automatically for us on computers, but for my iPhone, I had to configure it manually.
Once I had all of that sorted out, I copied the application code and ran pm2 to start the API automatically after booting and configured Nginx as a proxy server.
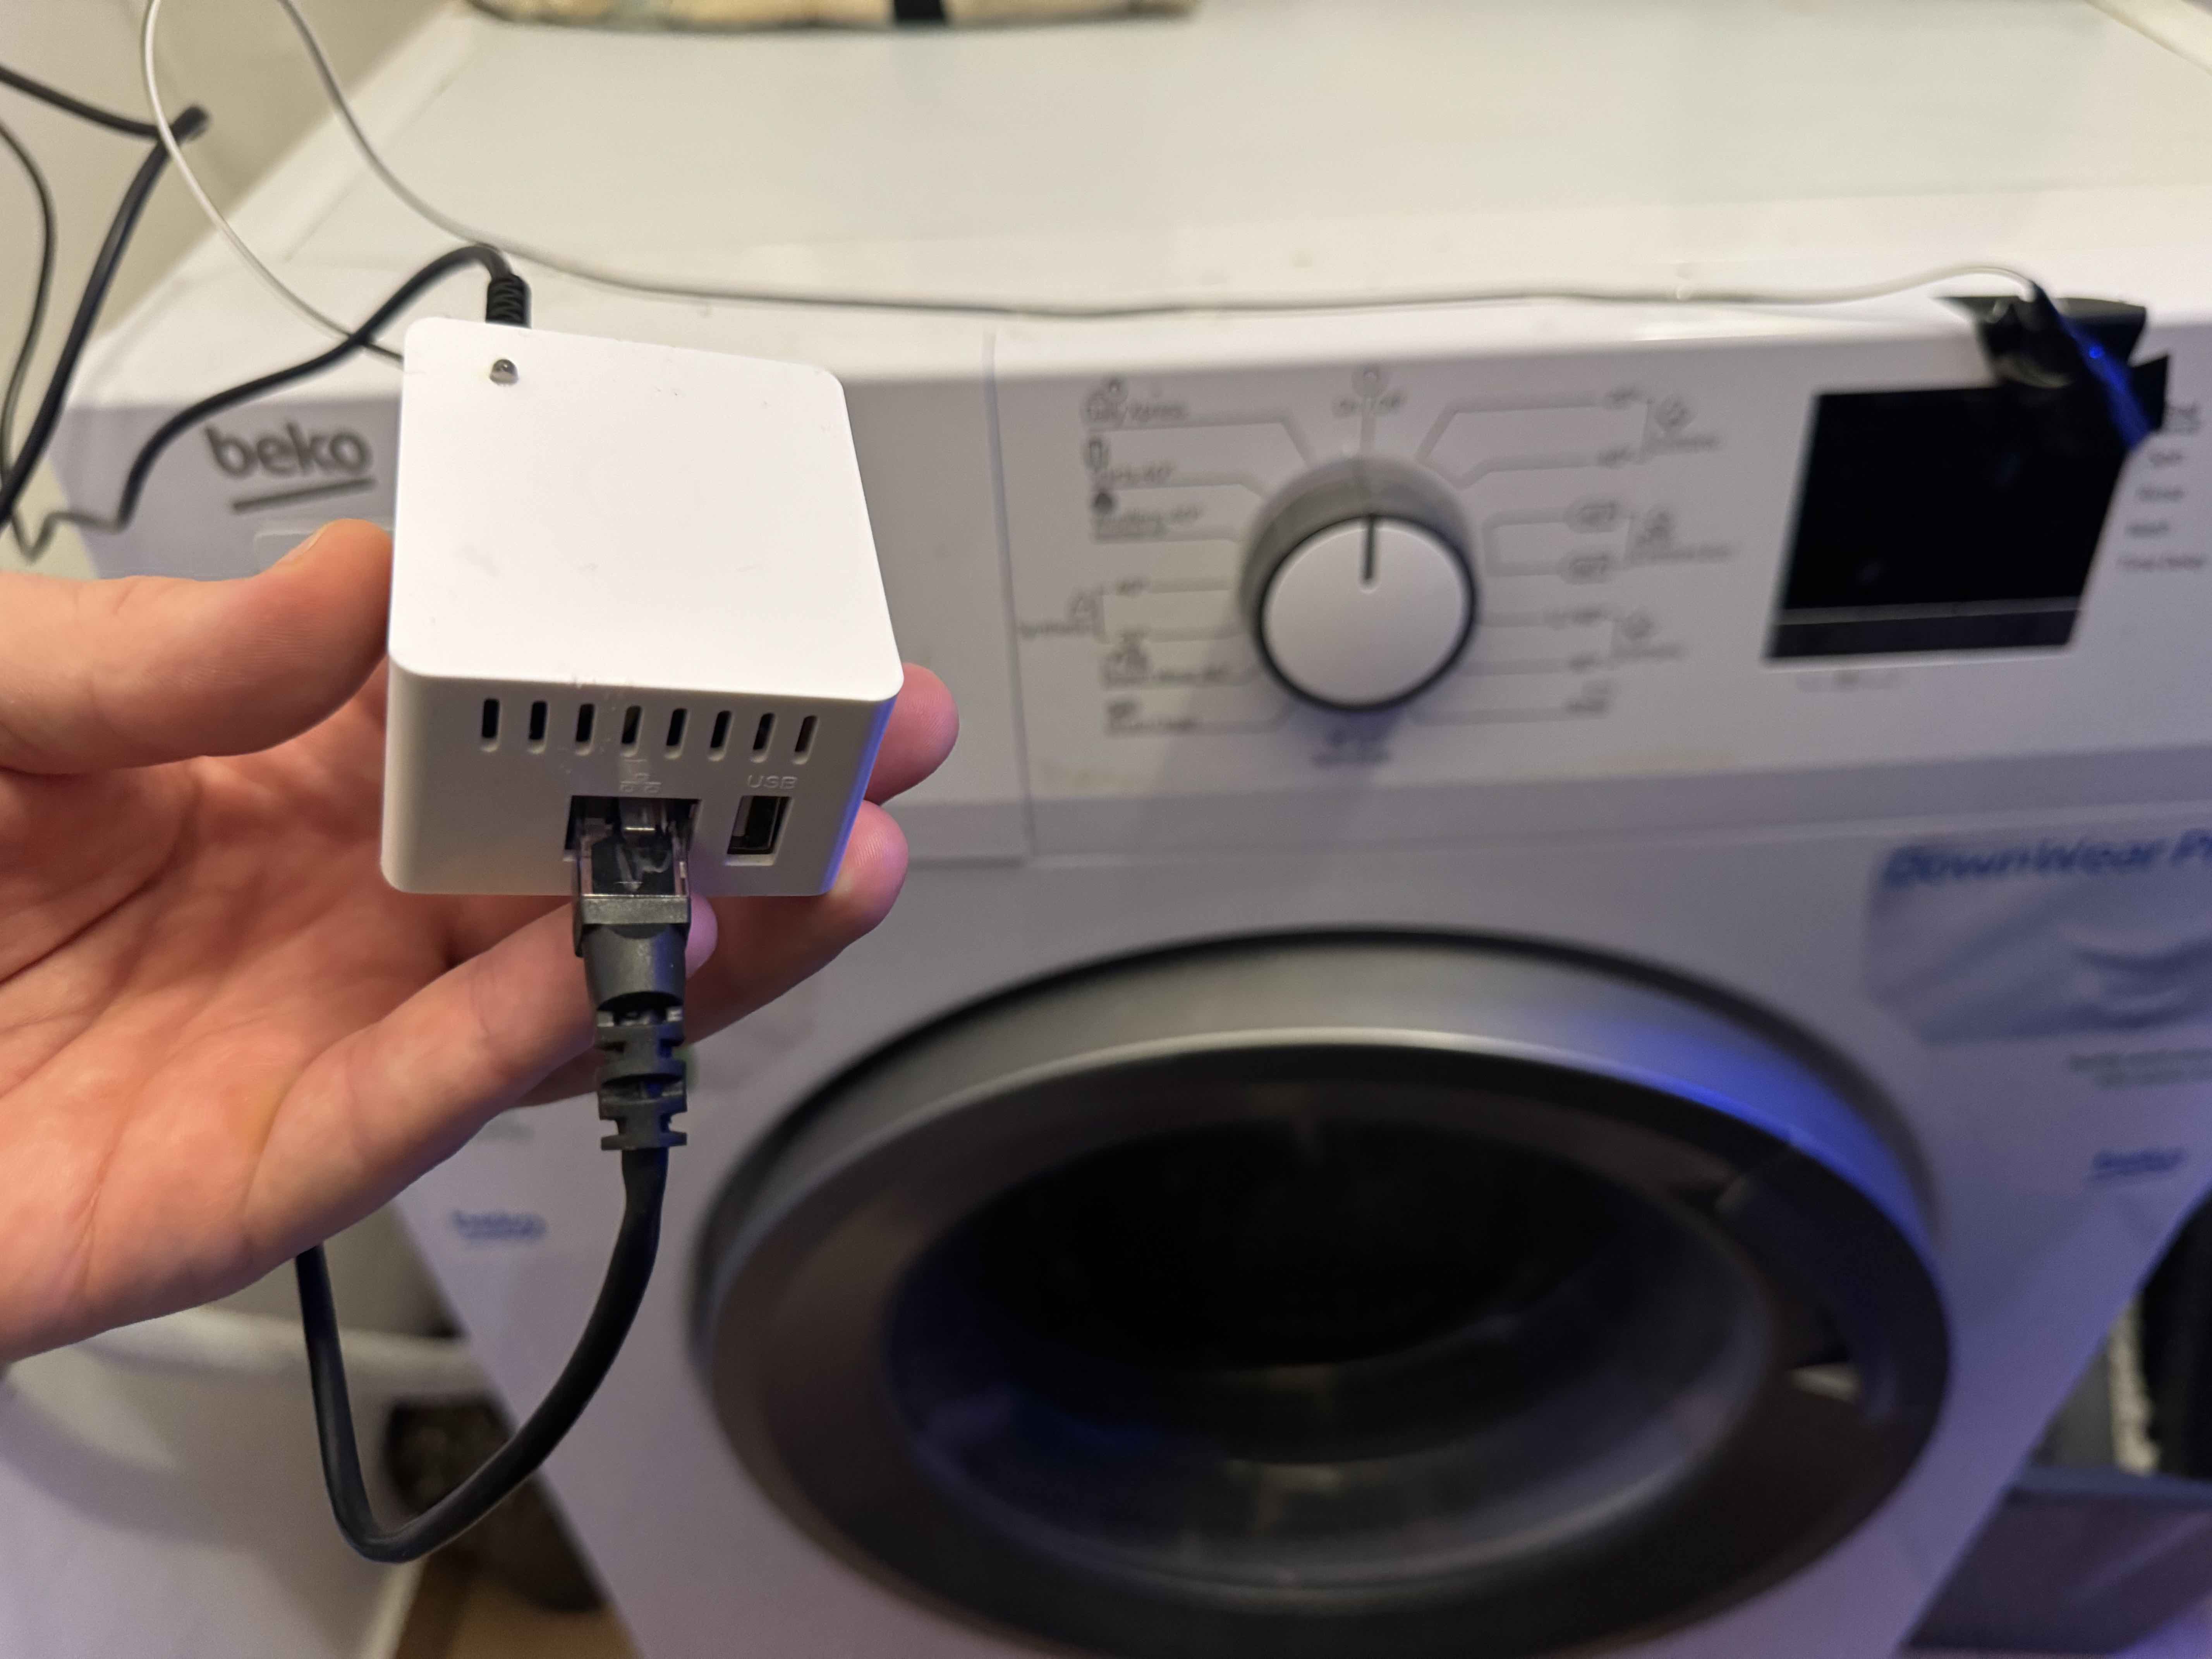
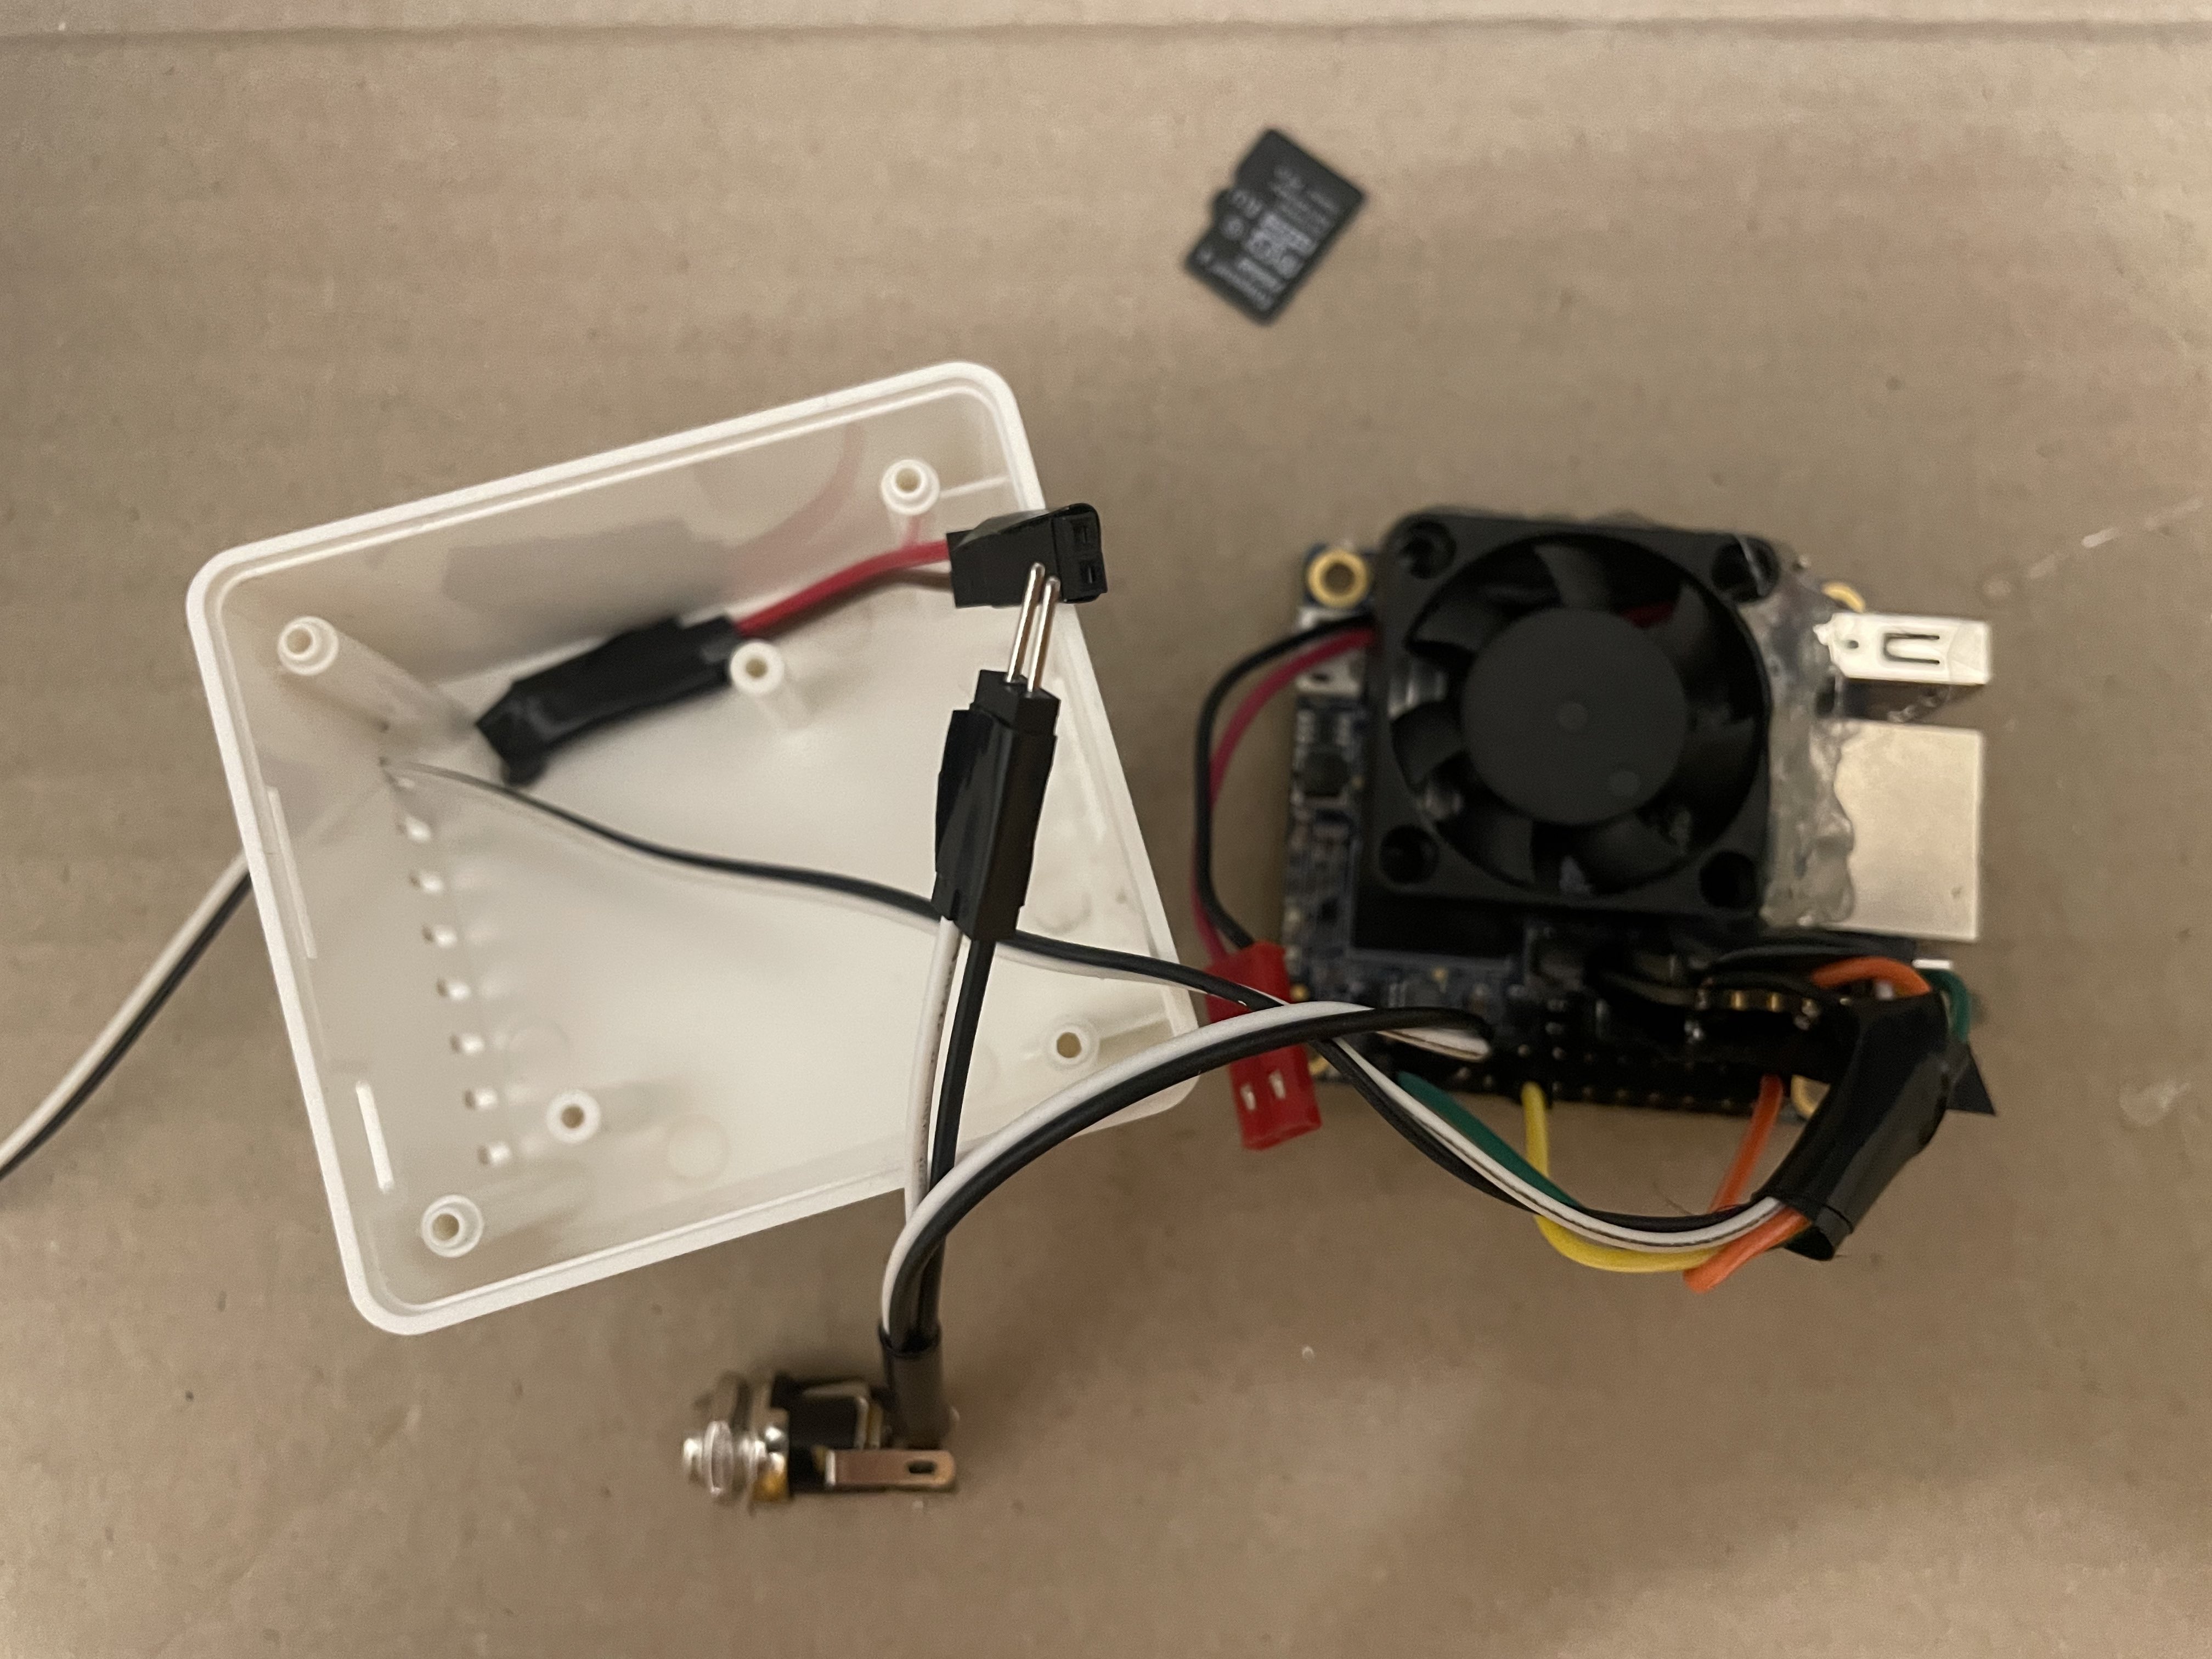
The last step was to put everything into a nice case. It was a bit of a struggle to fit everything inside but I think the result is awesome.
Concluding thoughts
After I completed all the parts it was time to verify if it was working. Even though it seemed to be a pretty simple project in the beginning, I faced many challenges along the way where things didn’t go as planned. I could keep telling you about situations like non-working WiFi on the board when I had to eventually use the Ethernet port or the CPU overheating, so I had to add a fan just to find out that now the AC adapter was not powerful enough, or static IP address acting up, soldering struggles, my failed attempts to make the A/D chip work and so many more…
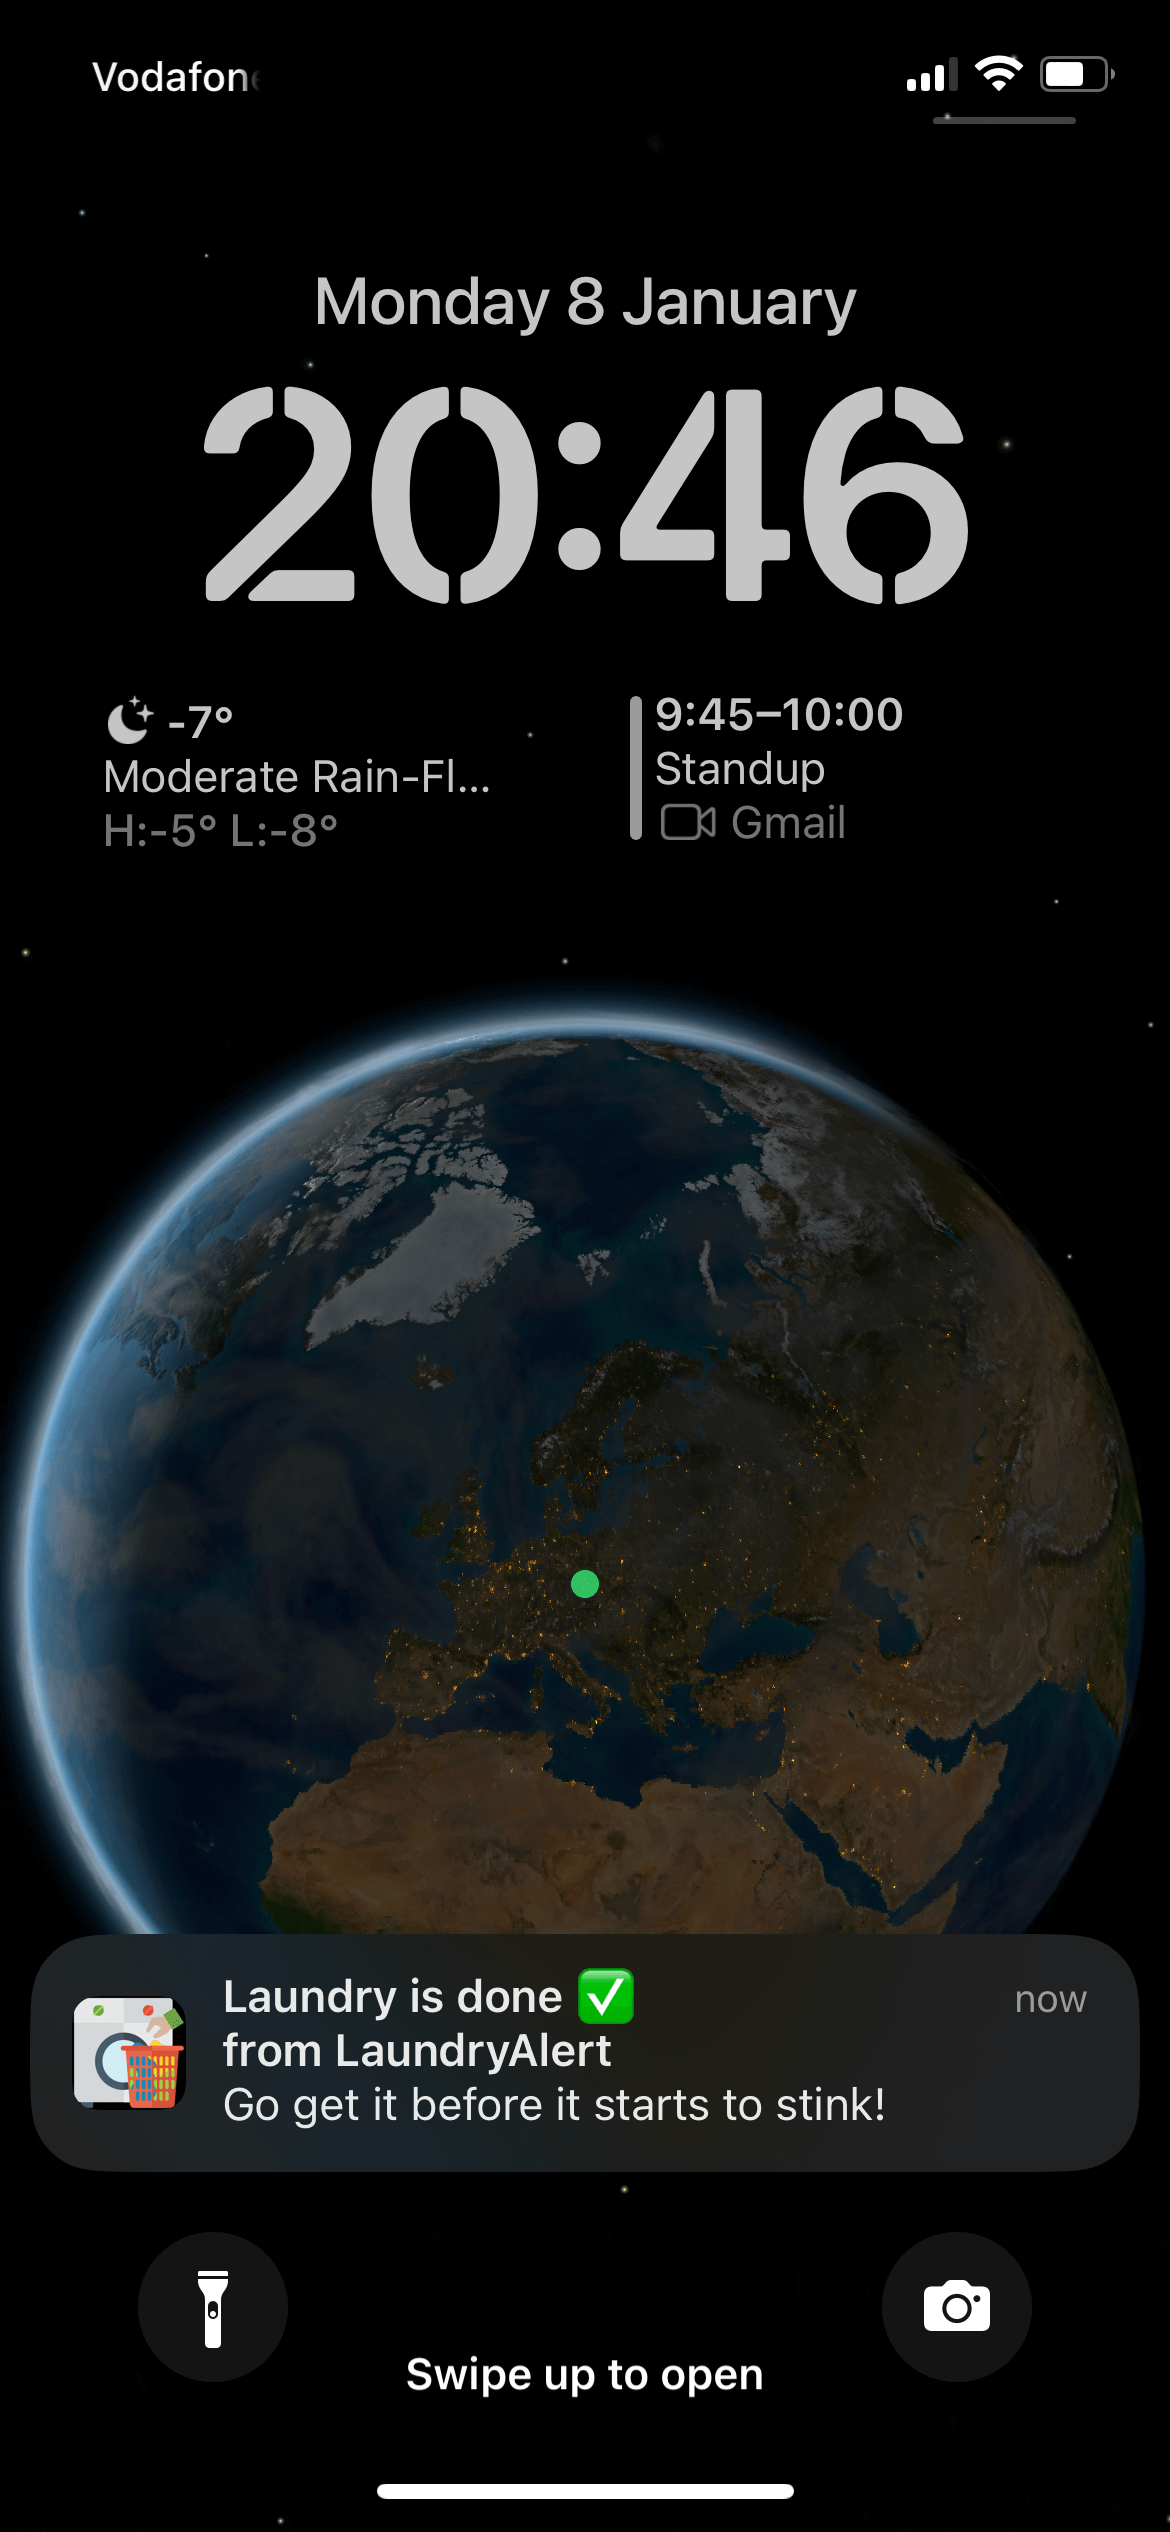
But after all these long nights spent debugging and trying out to make things work it was so rewarding to eventually see that one push notification appearing on my phone when the washing ended.
Especially, as my bread and butter is sitting in front of the computer all day long, it was nice building something tangible.
I had a lot of fun building this project and if you enjoyed reading the article, feel free to add comments. If you’re interested in the code and all the details, you can find the complete project documented on GitHub.