How I access my private homelab from the internet without a VPN
I have a Raspberry Pi at home that runs my homelab — Pi-hole, Home Assistant, monitoring, a small dashboard, and a few other self-hosted tools. As long as I’m home, everything works nicely over the local network. But the moment I leave the house, all of it becomes unreachable. And naturally, I didn’t want to fix that by exposing my whole network to the internet.
The real itch was the Home Assistant iOS app. It only accepts a URL — there’s no way to put a login screen in front of it, and I don’t like the idea of using VPN every time I want to check something. I wanted to open the app whenever I think of it, wherever I am, and have it just work.
In this post I’ll go through the options I considered, what didn’t work, and the setup I ended up with.
What are my options?
I wanted to access my home network from the internet without leaving it open to public, so I went through a couple of options:
Port forwarding + HTTP basic auth — the simplest thing you can do: expose the service publicly and add a password protection in front of it. But that means typing a password every single time, and worse, the Home Assistant app can’t deal with it at all — it just wants a plain URL.
Identity-aware proxy — a login page (e.g. Google sign-in) sitting in front of your services. You can self-host one (Authelia, Authentik, oauth2-proxy) or use a hosted option like Cloudflare Access. It’s a solid pattern, but it has the same problems: you have to explicitly log in first, your services are still publicly exposed, and the Home Assistant app still just wants a bare URL.
VPN (WireGuard / Tailscale) — the classic correct answer. Nothing is publicly exposed at all, and usually this is the way to go. But it requires you to connect to the VPN first, which is exactly what makes it impractical for the “open the app whenever I think of it” case.
Home Assistant Cloud (Nabu Casa) — solves the problem nicely, but only for Home Assistant, and costs ~8€/month. It does nothing for the rest of the homelab.
mTLS — the service is publicly reachable, but the TLS handshake itself requires a client certificate. On my devices, a plain URL just works — no login, no VPN. For everyone else, the connection is rejected before a single byte reaches the app. This is what I’ve decided to use.
What is mTLS?
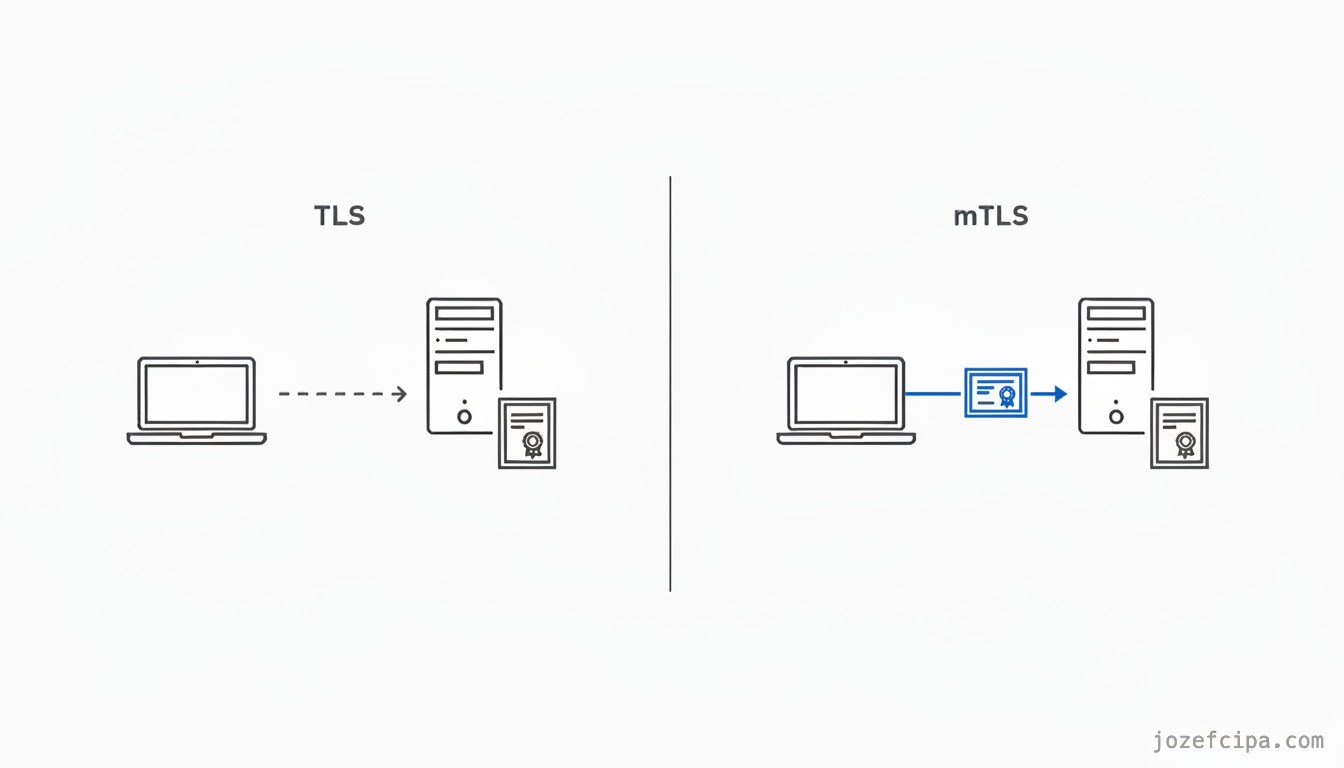
You’re using TLS right now — it’s the padlock in your browser. When you open a website over HTTPS, the server proves its identity to you with a certificate, so you know you’re really talking to your bank and not someone pretending to be it.
Mutual TLS (mTLS) simply makes this work both ways: your device also presents a certificate, and the server verifies it before letting you in.
The important part is when this happens. The certificate check is part of the TLS handshake itself — before any HTTP request is processed. So an unauthorized client doesn’t get a login page or a 403 error; the connection simply fails, and your application never even hears about it.
Which certificates are considered valid is entirely up to you — you become your own certificate authority (CA), and the server only accepts client certificates that you signed.
First attempt - Cloudflare Tunnel
My original idea was to use Cloudflare Tunnel. Its cloudflared daemon works similarly to ngrok — it creates an outbound tunnel between your local network and Cloudflare, and exposes a public URL that proxies traffic to your local services. No open ports on the router, no public IP needed, and Cloudflare terminates TLS at their edge.
So I bought a domain, installed cloudflared on the Pi, connected everything, and verified it worked. Then I went to configure mTLS and couldn’t find the option anywhere in the Cloudflare dashboard. Turns out, it lives in the WAF section, which is not available on Free accounts — mTLS with your own CA is an Enterprise feature 💸.
The whole setup worked, except for the one thing I actually needed.
Falling back to Tailscale
Tailscale deserves a quick explanation. It’s a VPN built on top of WireGuard, but instead of the traditional client–server model it creates a private mesh network called a tailnet. You install the Tailscale client on your devices and servers, log in, and they can all talk to each other over encrypted connections, no matter which network they’re physically on. No port forwarding, no public IP needed.
I already had my devices and the Pi connected to a tailnet, and honestly, for most cases this would be good enough. But it brings back the VPN problem — before opening the Home Assistant app, I’d have to remember to connect to the tailnet first.
In this case I don’t use Tailscale as the VPN I connect to. Instead, I use it the private transport between servers, and put a small server with a public IP in front of it.
Bastion server to the rescue
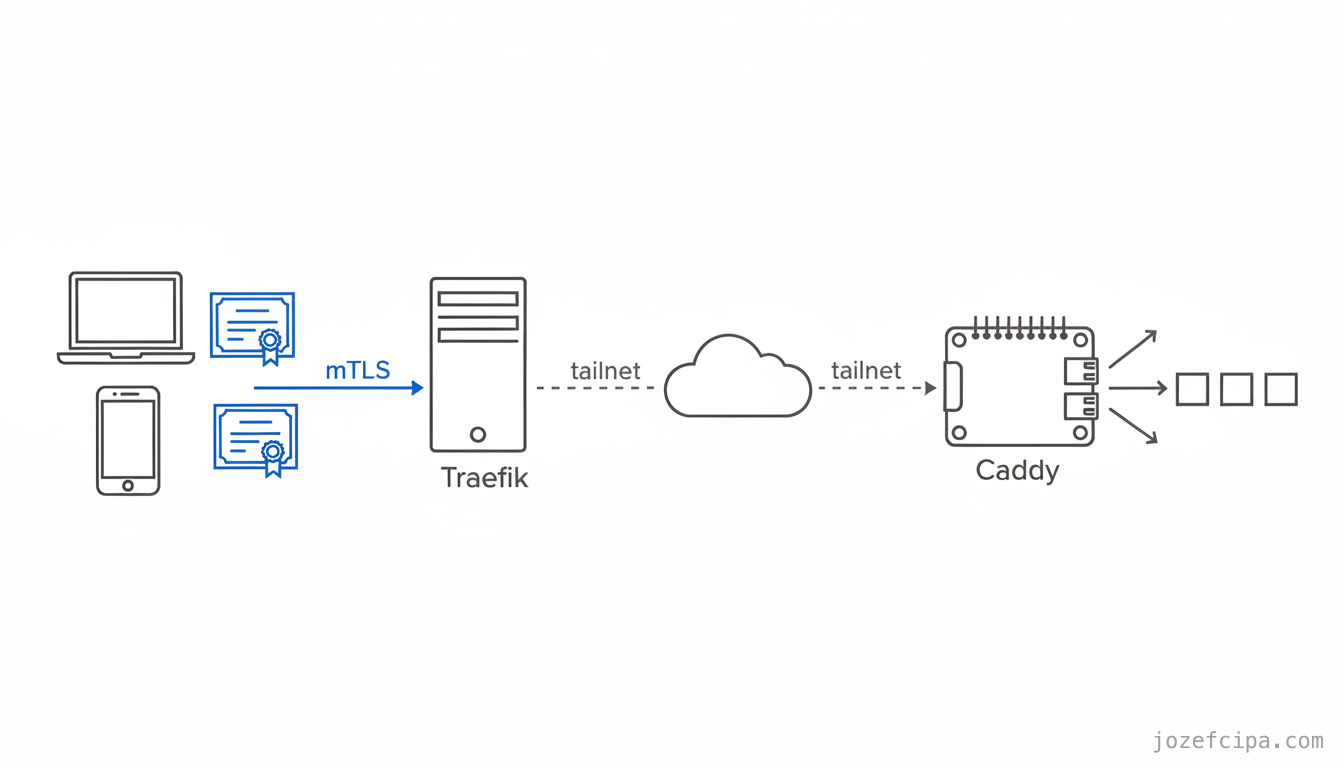
A bastion server is a small server that acts as the single public entry point to a private network. It has a public IP address so it’s reachable from the internet. Then, it proxies all the incoming traffic through the tailnet to my Raspberry Pi.
I use Oracle Cloud Free Tier VPS — a small machine with a public IP that is completely free of charge. The setup on it looks like this:
- Traefik terminates public TLS on port 443 and requires + verifies a client certificate signed by my own CA. No valid certificate means the TLS handshake fails and nothing gets proxied.
- The server certificate is a wildcard
*.cipa.hauscert from Let’s Encrypt, obtained via the DNS-01 challenge (Traefik talks to the Cloudflare DNS API). I went with DNS-01 for two reasons: it doesn’t need an open port 80, and it’s the only challenge type that can issue wildcard certificates. - Verified traffic is then forwarded over the tailnet to the Raspberry Pi, where Caddy routes requests by hostname to the individual services.
The mTLS part is surprisingly little config. In Traefik’s dynamic configuration:
tls:
  options:
    default:
      clientAuth:
        caFiles:
          - /etc/traefik/ca/client-ca.pem   # my CA's public cert
        clientAuthType: RequireAndVerifyClientCert
      minVersion: VersionTLS12
There’s one sneaky detail: these TLS options must be named default. Traefik doesn’t apply TLS options per router — it selects them by SNI. SNI (Server Name Indication) is a field in the TLS handshake where the client tells the server which hostname it’s connecting to, so that a single server on one IP can present the right certificate for many domains. My router doesn’t match on any hostname (see below), so there’s no SNI-to-router mapping to attach named options to — and if you name the options anything other than default, Traefik silently falls back to its built-in defaults, which means no client certificate check at all 😅
The routing itself is a single catch-all router that sends everything to the Pi’s Caddy:
http:
  routers:
    bastion:
      rule: "PathPrefix(`/`)"
      entryPoints:
        - websecure
      service: pi-caddy
      tls: {}
  services:
    pi-caddy:
      loadBalancer:
        passHostHeader: true
        servers:
          - url: "https://<pi-tailnet-ip>:8443"
This has a neat side-effect: since the router matches every hostname, the certificate is a wildcard, and the mTLS check is host-independent, adding a new service requires zero changes on the bastion. I just add the new subdomain to the Pi’s Caddyfile — Traefik passes the Host header through and Caddy does the routing.
Becoming my own certificate authority
For mTLS to work, someone has to issue the client certificates. That’s the job of a certificate authority — and since only my bastion needs to trust it, I can simply be my own CA. Two small openssl scripts handle everything.
The first one creates the root CA:
$ openssl genrsa -out ca.key 4096

$ openssl req -x509 -new -nodes -key ca.key -sha256 -days 3650 \
  -subj '/CN=cipa.haus homelab client CA' \
  -addext 'basicConstraints=critical,CA:TRUE,pathlen:0' \
  -addext 'keyUsage=critical,keyCertSign,cRLSign' \
  -out ca.crt
Two files come out of it, and the split between them is the entire security model:
ca.key— the private key. Whoever holds it can mint certificates that my bastion trusts, so it stays offline on my Mac and never touches git or the server.ca.crt— the public cert. This is the only piece that goes to the bastion — it’s theclient-ca.pemthat Traefik verifies clients against.
The second script issues one certificate per device:
$ openssl genrsa -out jozef-iphone.key 2048

$ openssl req -new -key jozef-iphone.key -subj '/CN=Jozef iPhone' -out jozef-iphone.csr

$ openssl x509 -req -in jozef-iphone.csr -CA ca.crt -CAkey ca.key \
  -CAcreateserial -days 825 -sha256 \
  -extfile <(printf 'basicConstraints=CA:FALSE\nkeyUsage=critical,digitalSignature\nextendedKeyUsage=clientAuth') \
  -out jozef-iphone.crt

# bundle the key + cert + CA into a .p12 for the device
$ openssl pkcs12 -export -legacy \
  -inkey jozef-iphone.key -in jozef-iphone.crt -certfile ca.crt \
  -name 'Jozef iPhone' -out jozef-iphone.p12
Each device gets its own key and certificate, bundled into a password-protected .p12 file — the format you install on macOS and iOS.
Note the -legacy flag on the last command. OpenSSL 3 switched .p12 bundles to newer encryption algorithms, and Apple’s importers silently reject them. -legacy falls back to the older algorithms that iOS and the macOS Keychain accept 🙃
Installing certs on devices
On macOS, this is as simple as double-clicking the .p12 file — after entering the export password, the certificate lands in the Keychain.
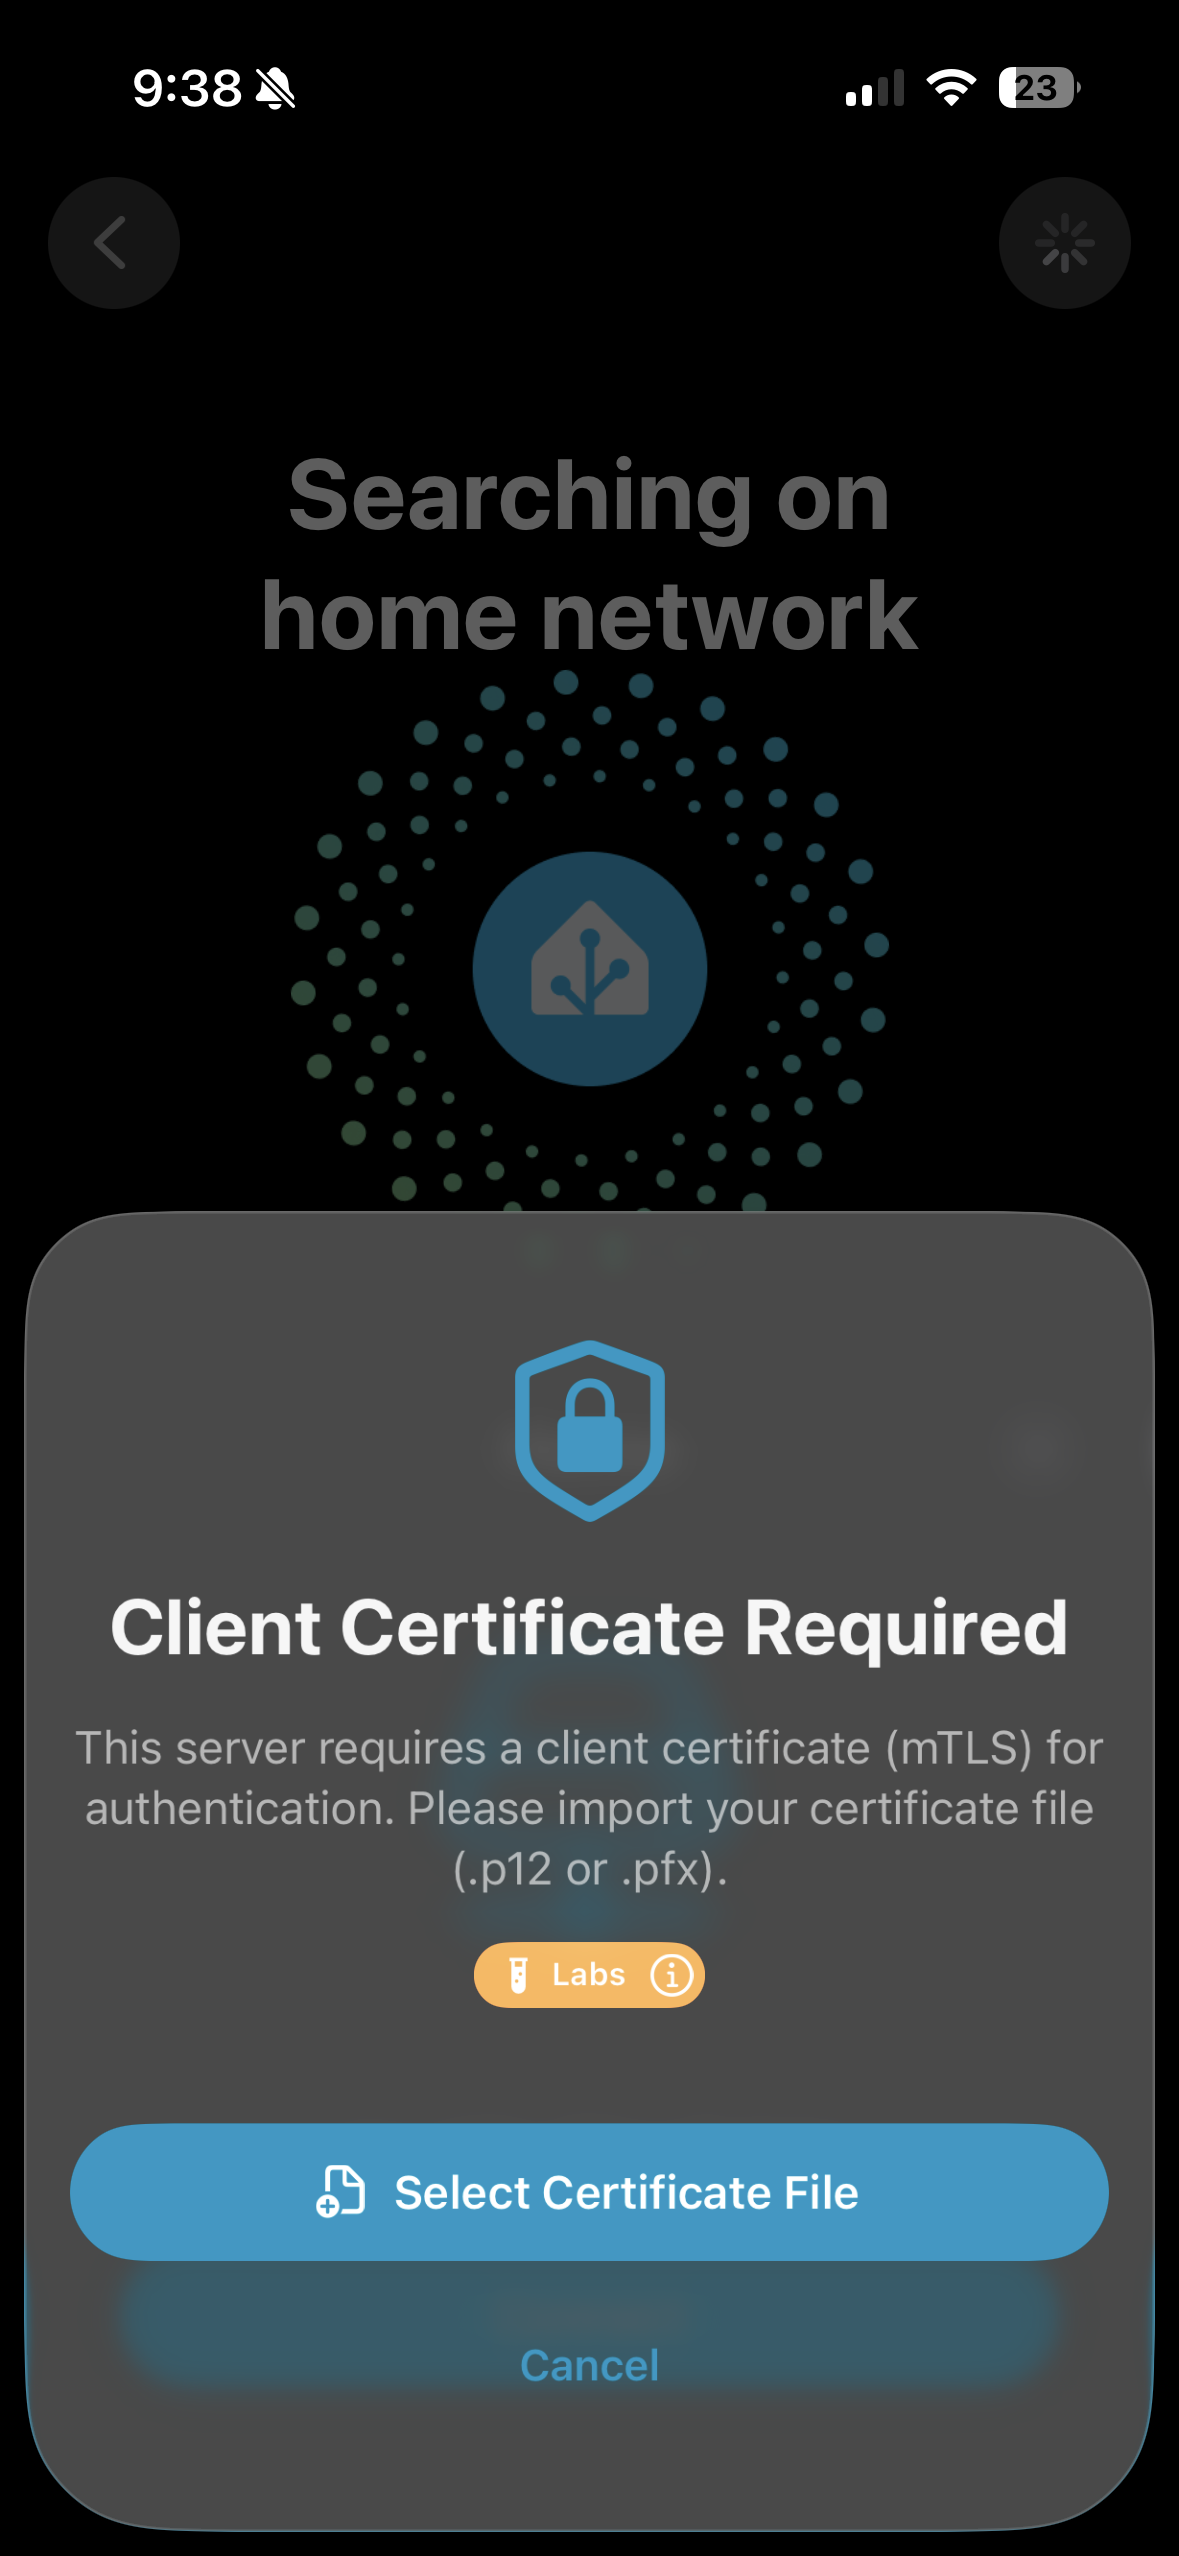
On iOS, it’s a bit more involved — the .p12 needs to be installed as a configuration profile. I described the whole process in a separate article, so I won’t repeat it here.
The last piece is DNS: an A record pointing the domain at the bastion’s public IP, with Cloudflare’s proxying turned off (the grey cloud icon). With the orange-cloud proxy enabled, TLS would terminate at Cloudflare’s edge and the client certificate would never reach Traefik.
The moment of truth
Time to test it, first from the terminal:
# no client certificate → the TLS handshake fails, nothing is proxied
$ curl -I https://ha.cipa.haus
curl: (56) LibreSSL SSL_read: LibreSSL/3.3.6: error:1404C45C:SSL routines:ST_OK:reason(1116), errno 0

# with the certificate → HTTP 200
$ curl -I --cert-type P12 --cert jozef-macbook.p12:<password> https://ha.cipa.haus
HTTP/2 200
alt-svc: h3=":443"; ma=2592000
content-type: text/html; charset=utf-8
date: Wed, 15 Jul 2026 08:44:49 GMT
via: 1.1 Caddy
x-robots-tag: noindex, nofollow
cipa.haus is the public gateway to my homelab — it serves a small dashboard with links to all the services. My devices have the certificate installed, so the site just opens. For everyone else, the connection is rejected during the handshake and they never even see a page.
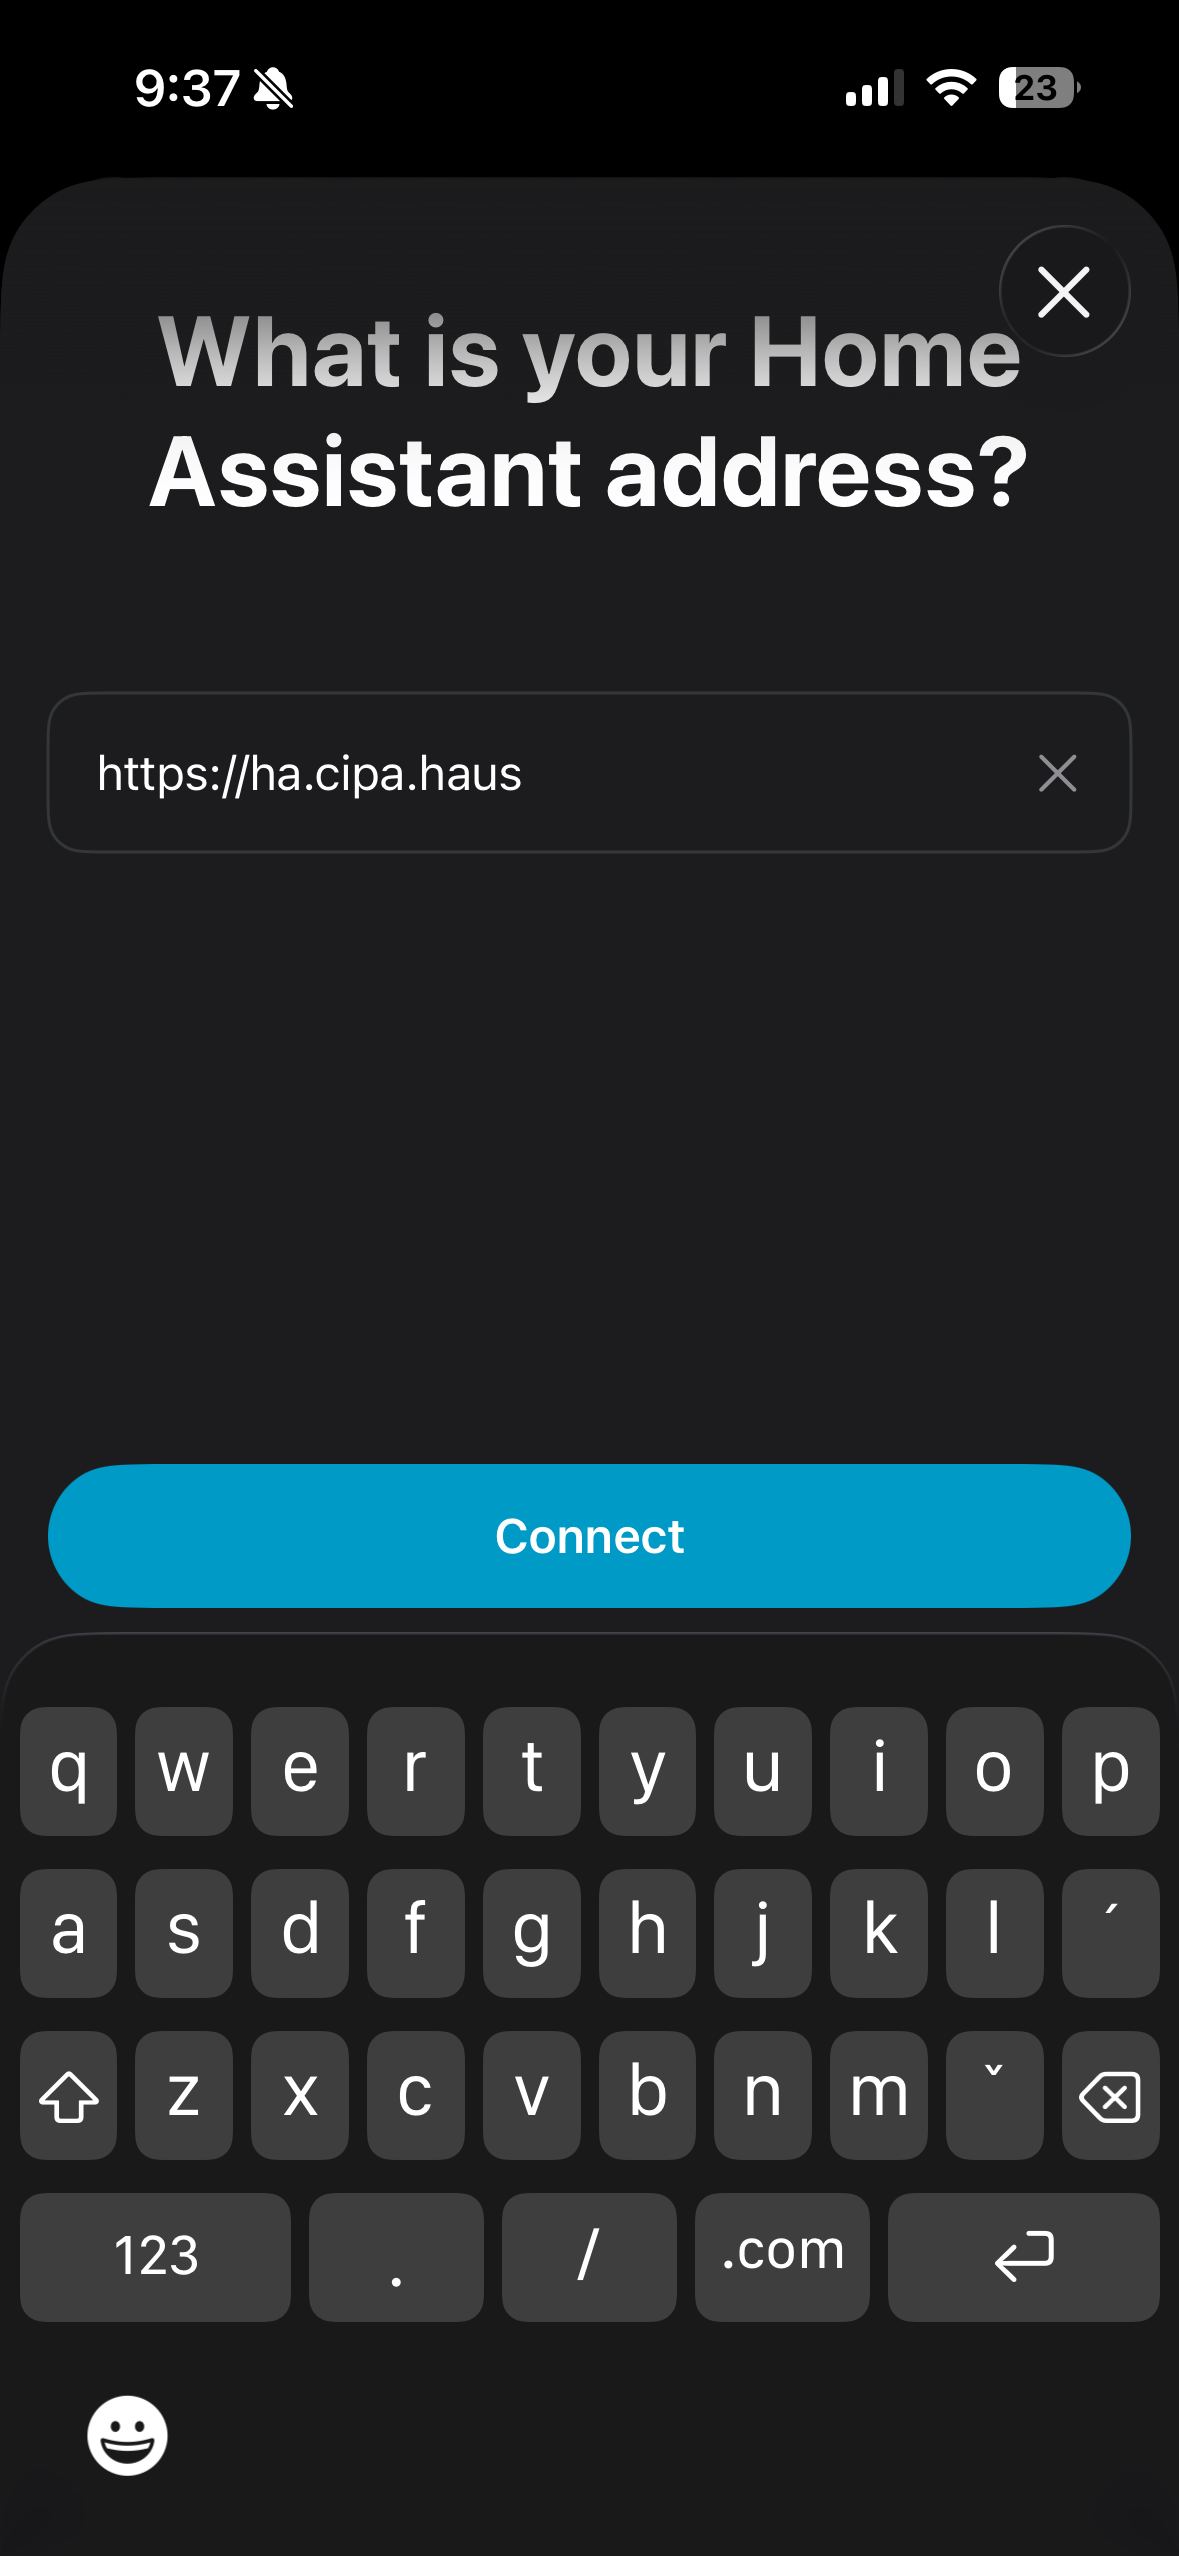
And the payoff that started this whole project: I put ha.cipa.haus into the Home Assistant iOS app — a plain URL, no explicit authentication — and it just works, from anywhere. iOS picks up the installed client certificate automatically ✅
Limitations & honest notes
Of course, this setup has its rough edges too, so here’s what to keep in mind:
- No certificate revocation. There’s no CRL (certificate revocation list) wired up yet. If I lose a device today, the only option is re-minting the CA and re-issuing the certificates for all devices.
- Certificates expire. The client certs are only valid for a certain period, so future me will eventually have to re-issue them and go through the install dance on every device again.
- The bastion is still a public attack surface. Only ports 80 and 443 are open (and 80 does nothing but redirect to HTTPS), and any connection without a valid certificate dies during the handshake — but the box is still sitting on the public internet.
- The bastion→Pi hop skips TLS verification. Caddy on the Pi serves a self-signed certificate, so Traefik connects to it with verification disabled. I’m fine with that — this leg runs entirely inside the encrypted tailnet.
- Certificate prompts can get annoying. Chrome on the Mac asks for a password quite often when trying to use the certificate. On the iPhone everything works well through Safari — Chrome doesn’t support mTLS on iOS at all.
Wrapping up
So that’s how I access my homelab from anywhere — no VPN, no monthly subscription, just a certificate installed on my devices. The whole thing runs on a free VPS, and the Home Assistant app finally works wherever I am.
Along the way I learned about TLS internals and Traefik, and it turns out that running your own certificate authority is surprisingly simple — a couple of openssl commands and you have one.